
KBI 311577 Argent for Oracle Requires Oracle 12C 32 Bit Client And 32 Bit Visual C Redistributable For Visual Studio 2013
Version
Argent Advanced Technology 5.1A-1610-A or above
Thursday, 14 September 2017
To support both 32 bit and 64 bit Oracle database server environments, Argent for Oracle requires 32 bit Oracle 12C client and 32 bit Visual C Redistributable For Visual Studio 2013 needs to be installed in the Argent Server before upgrading Argent AT to version 5.1A-1610-A or above
Argent uses Oracle 12c C Call Interface to monitor Oracle database server and these libraries are built using Visual C 2013
So 32 bit Visual C Redistributable Package for Visual Studio 2013 must be installed in Argent server to monitor the Oracle databases using Argent for Oracle
The Visual C Redistributable Package for Visual Studio 2013 is downloadable in following Microsoft link:
https://www.microsoft.com/en-in/download/details.aspx?id=40784
Argent for Oracle also requires Oracle 12C 32 bit client needs to be installed in Argent server before upgrading Argent Advanced Technology to 5.1A 1610-A
The Oracle client installation package is available in following Oracle website:
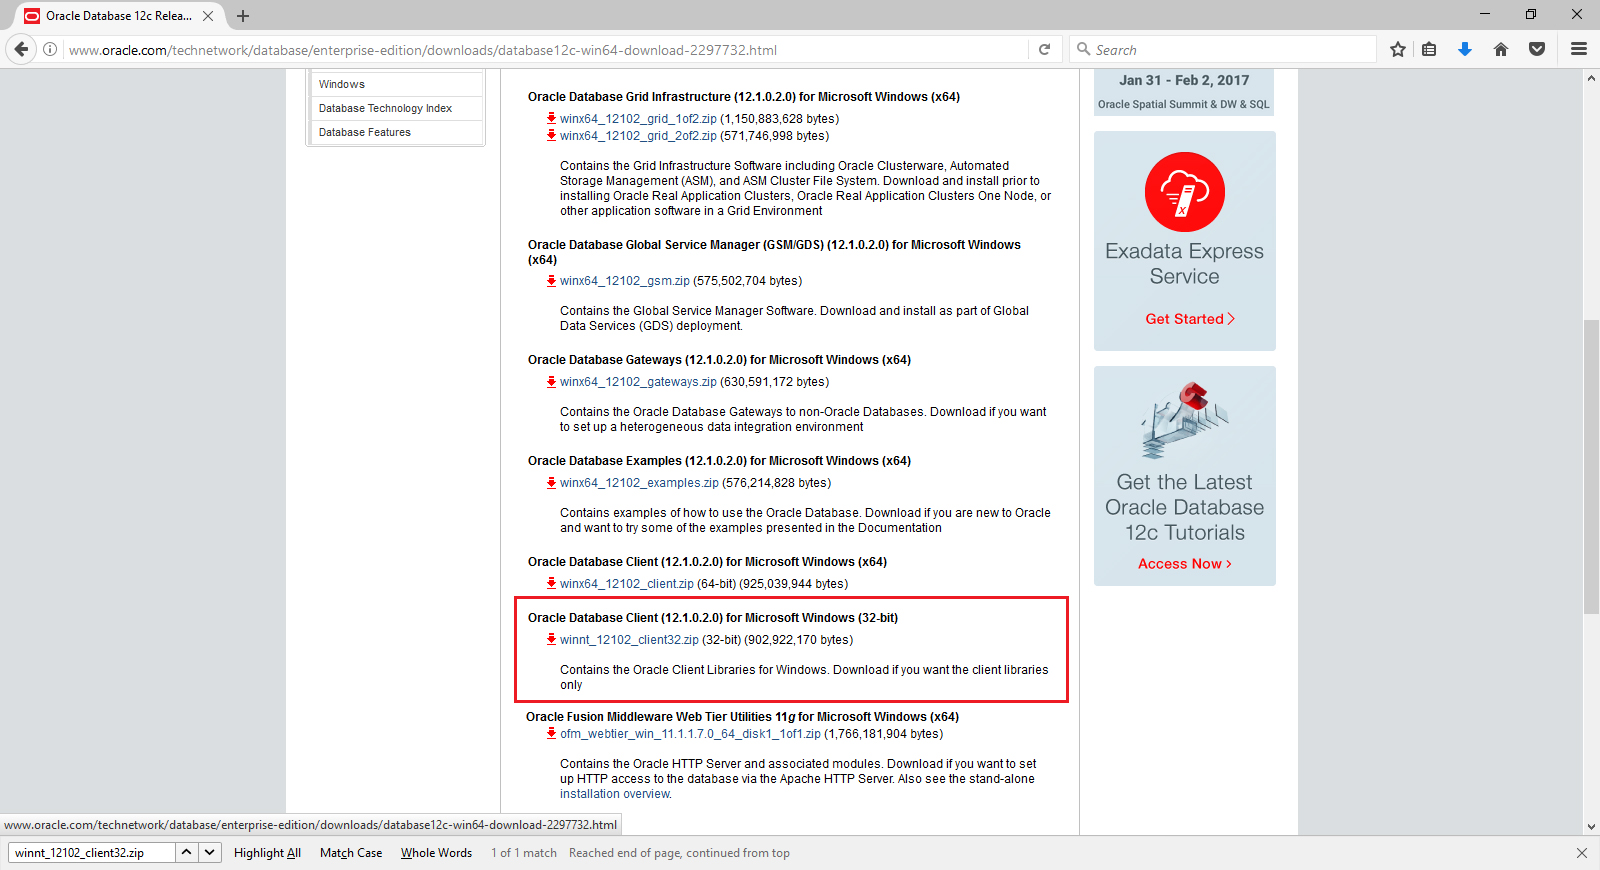
The detailed steps of installation and configuration are described in the following sections
Note: Before starting Oracle 12C 32 bit client installation, make sure that “Argent for Oracle – Scheduling Engine” service is stopped
Install And Configure Oracle 32 bit 12C Client
Download and extract the installation zip file and run setup.exe
This will bring the following screen:
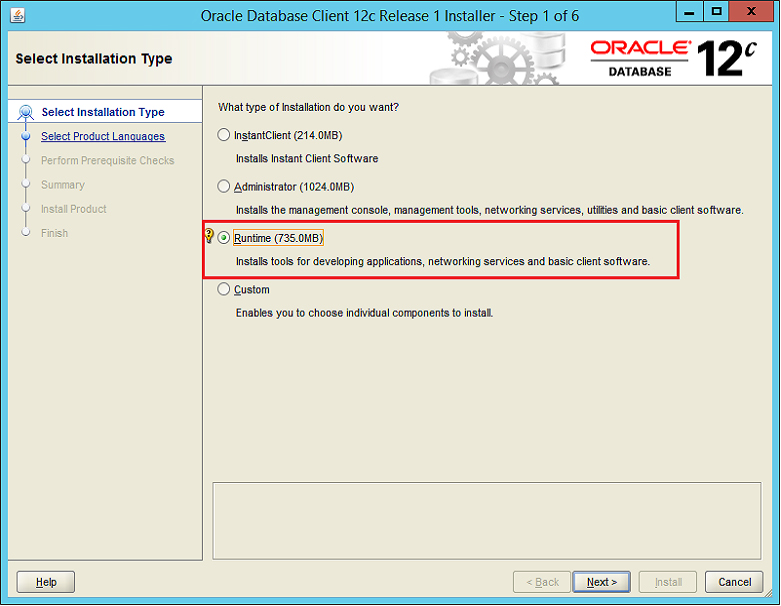
Select the above highlighted type of installation and click ‘Next’ button
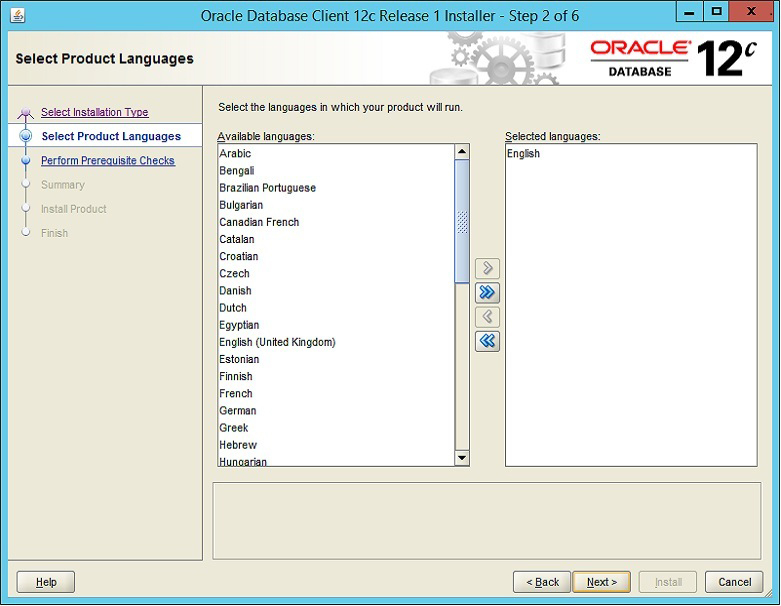
Select the language and click ‘Next’ button
Specify Oracle home user:
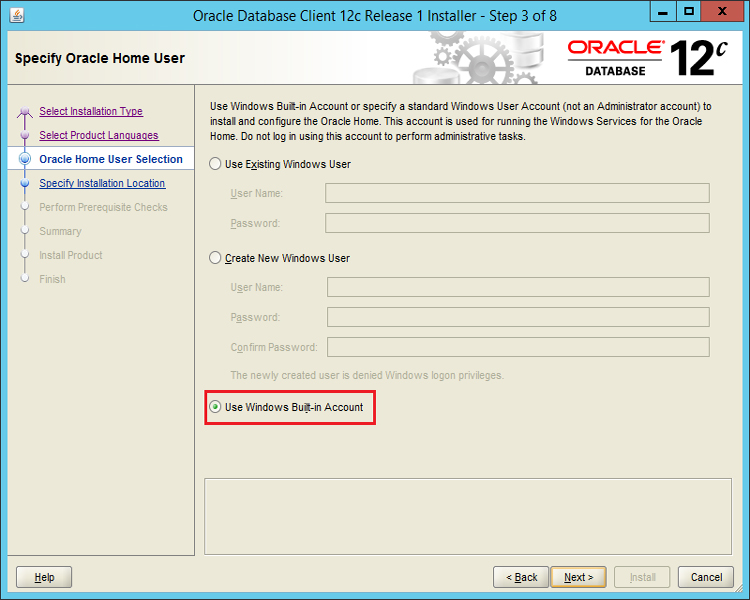
Choose ‘Windows Built-in Account’ as shown above and click ‘Next’ button
Specify installation location:
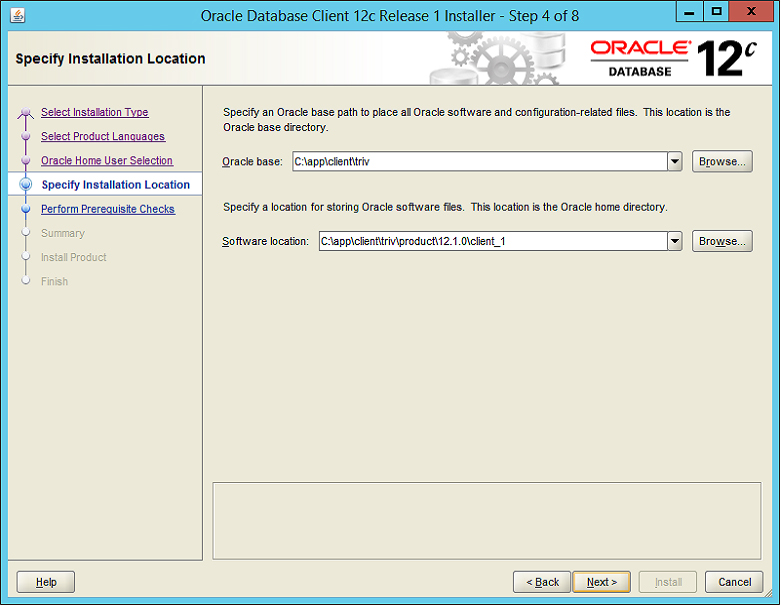
Click ‘Next’ Button
The next screen shows the installation summary as shown below:
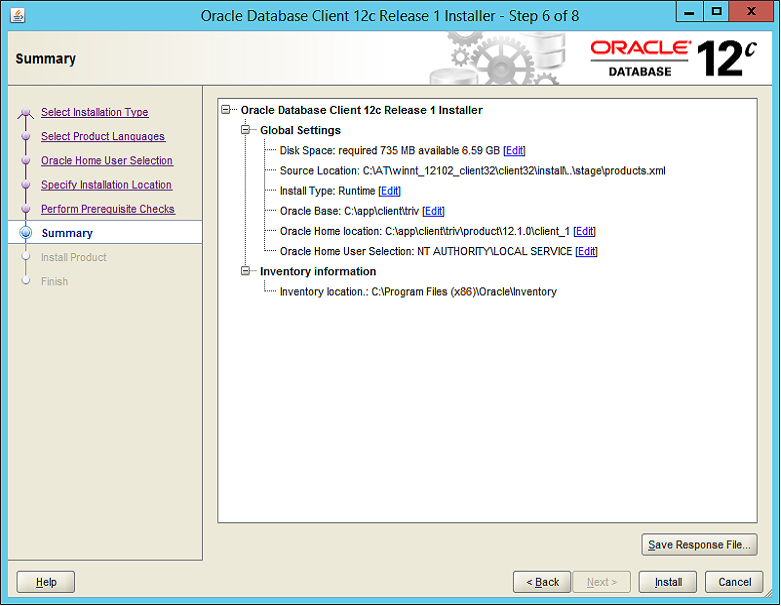
Click ‘Install’ button to proceed the installation
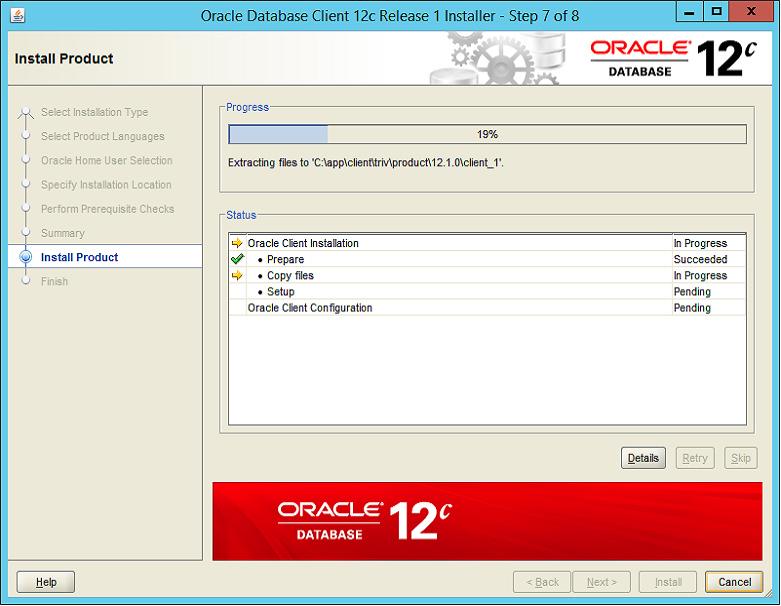
Installation in progress:
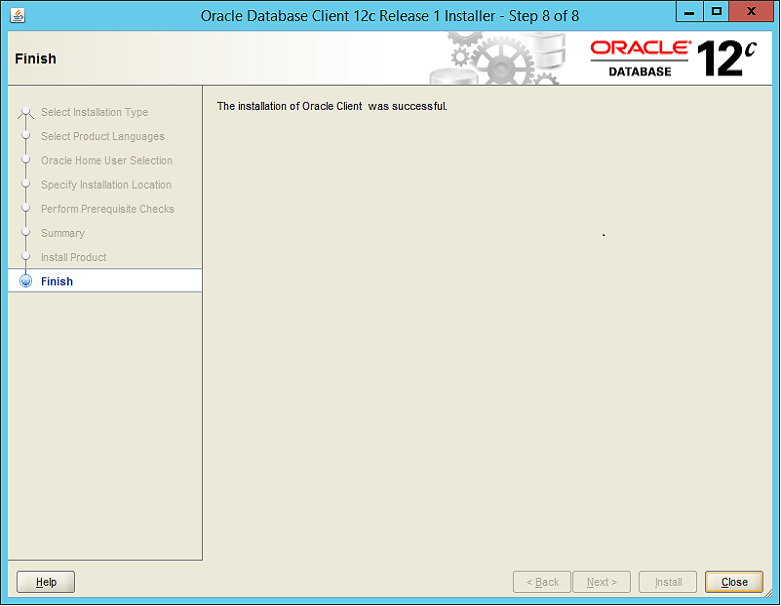
Successful installation shows the following final screen:
Configure Oracle Service Name
After the Oracle Client Installation, Oracle Service Name must be configured to establish connection with Oracle Server
For this, create a file, named ‘tnsnames.ora’ in the Network\Admin folder of the Oracle installation path
As per the configuration illustrated in the above screenshots, it will be
‘C:\app\client\\riv\product\12.1.0\client_1\\
etwork\admin’
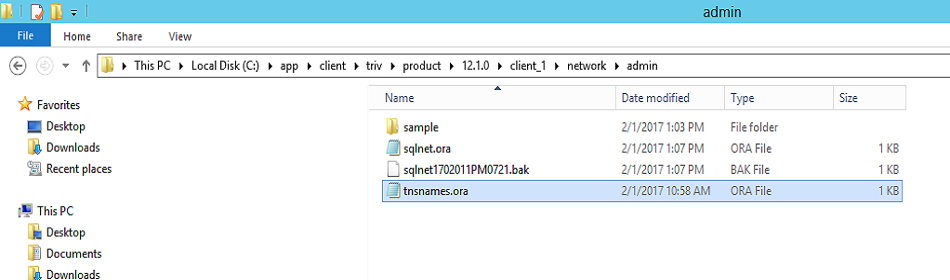
A sample ‘tnsnames.ora’ file is shown below
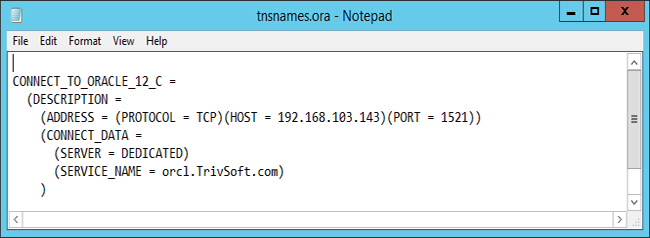
Explanation of tags is as follows:
| Machine name or IP address of the Oracle Server | ||
| Port number that Oracle is listening for incoming connections | ||
| Name configured at the time of Oracle Server installation | ||
Note: After the installation of Oracle 12C 32 bit client, please remember to start ‘Argent for Oracle – Scheduling Engine’ service
N/A