Argent Job Scheduler Migration from Codebase To MSDE
Pre-requisites: IMPORTANT
-
Customers who wish to convert to the MSDE backend must upgrade to the most recent version FIRST. If customers attempt to move to the MSDE before upgrading to the current version, the import of fields and tables into the SQL database will fail.
-
ENSURE that the Argent database is experiencing NO Codebase Errors by running the database integrity check utility. Corruption must not be present in the Codebase files. If the database is currently experiencing errors of this type, correct these issues PRIOR to attempting conversion to MSDE.
-
If MSDE is installed on the same server as the Argent Job Scheduler, ensure that the SQL instance is not configured to consume an excessive amount of RAM. This will detract from the performance of the Argent Job Scheduler. Ensure that the Argent Job Scheduler has a minimum of 128MB of RAM available.
Migrate Argent Job Scheduler From CodeBase to MSDE Backend
Argent Job Scheduler consists of Scheduling Engine and Queue Engine. The Scheduling Engine can use MSDE as its database backend. The migration steps are described as follows.
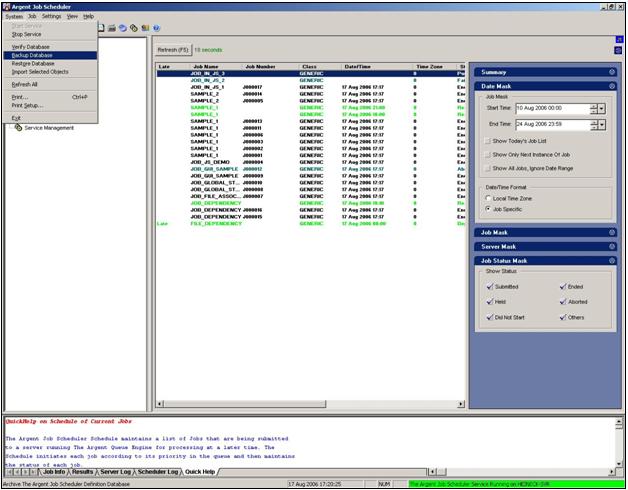
The first step is to back up the Argent Job Scheduler database using the main GUI. Customers start by selecting Backup Database from the System menu as shown below:
If the Argent Job Scheduler services are active, the customer is prompted to end the services as shown below:
Customers must click Yes to confirm the request to end the services and continue. Customers click No to cancel and exit the migration procedure.
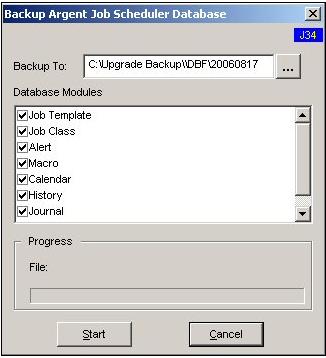
The customer is prompted to specify the name of a folder that will contain the backup files. The customer must specify the name of a folder other than a folder in the installation folder for the Argent Job Scheduler. An example is shown below:
The customer completes the dialog by ensuring that all types of database modules are selected for backup. The customer clicks Start to begin the backup.
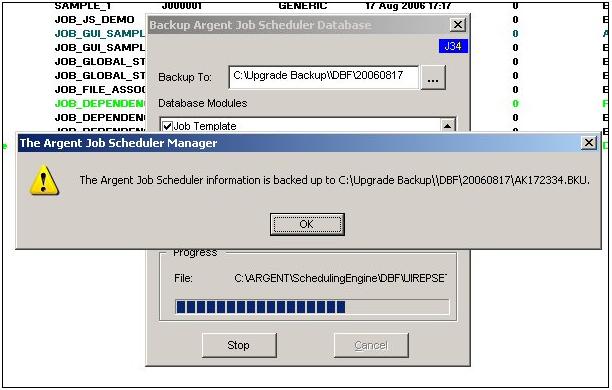
When the backup is complete, a confirmation message is displayed as shown in the example below:
The customer then proceeds to de-installing the Argent Job Scheduler scheduling engine.
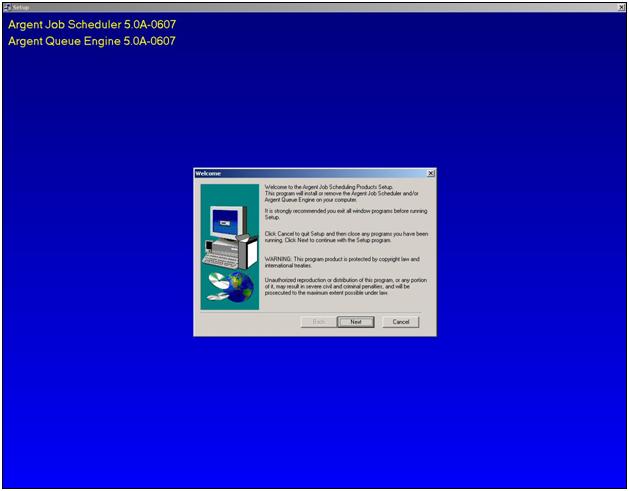
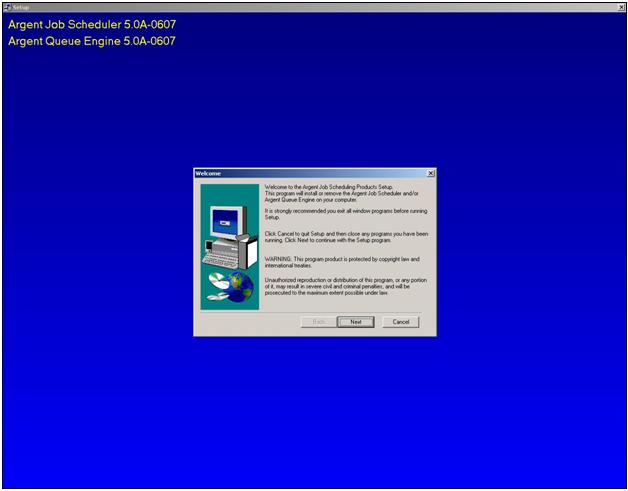
From the C:\ARGENT\SchedulingEngine folder, double-click SETUP.exe to start the de-installation process. The Argent Job Scheduler setup window is shown as in the example below:
The customer clicks Next to continue.
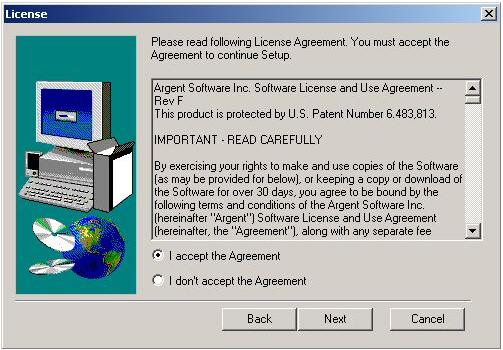
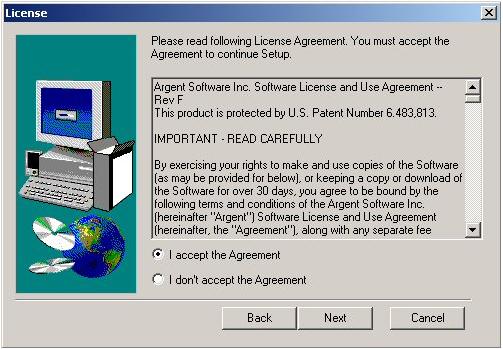
The license confirmation window is displayed as shown in following example.
The customer selects I accept the Agreement and then clicks Next to continue.
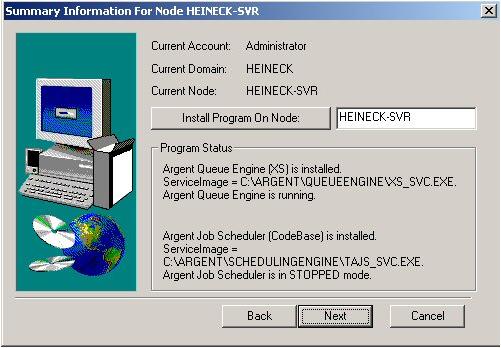
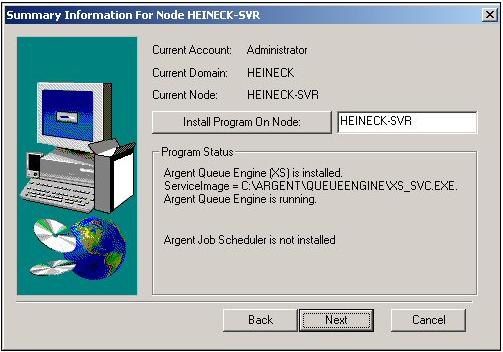
The installation summary confirmation window is displayed as in the following example.
The customer must click Next to continue.
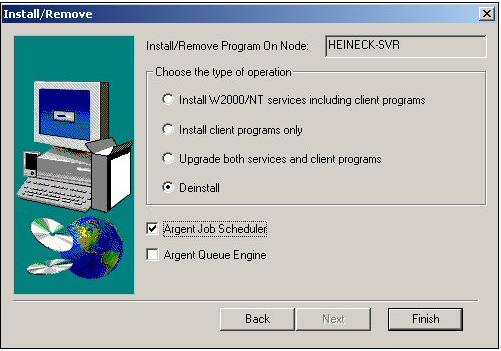
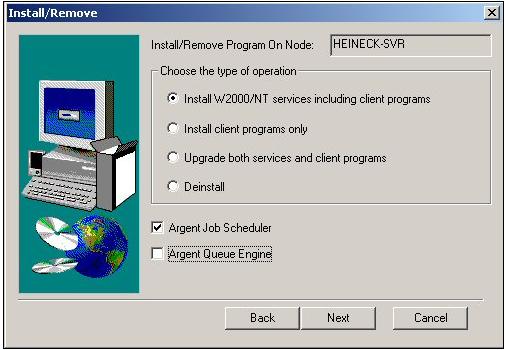
The Install/Remove window is displayed as shown in the following example:
The customer must select Deinstall and de-select the Argent Queue Engine as shown below:
The customer then clicks Finish to continue.
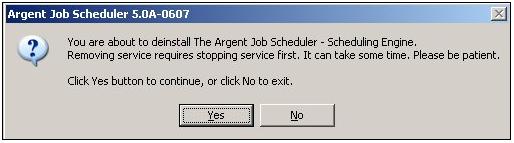
A message is displayed requesting that the customer wishes to stop the Argent Scheduling Engine service. An example is shown below:
The customer must click Yes to continue de-installing the Argent Job Scheduler scheduling engine.
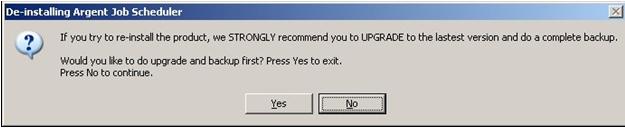
A warning message is displayed urging the customer to upgrade to the latest release and perform a backup. An example is shown below:
The customer must click No to continue de-installing the Argent Job Scheduler scheduling engine.
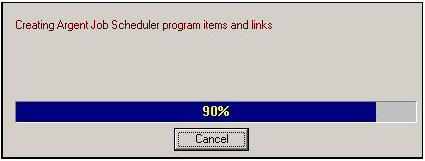
A progress window is displayed as shown in the following example:
When the de-installation process is complete, the customer ends the process by clicking OK.
From the folder where the Argent Job Scheduler install kit resides, the customer begins the re-installation by double-clicking SETUP.exe. The Argent Job Scheduler setup window is shown as in the example below:
The customer clicks Next to continue.
The license confirmation window is displayed as shown in following example.
The customer selects I accept the Agreement and then clicks Next to continue.
The installation summary confirmation window is displayed as in the following example.
Note that the Argent Job Scheduler is no longer installed. The customer clicks Next to continue
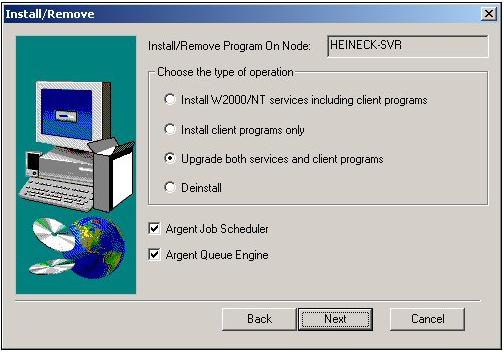
The Install/Remove window is displayed. The customer must select Install W2000/NT Services including client programs and de-select the Argent Queue Engine as shown in the example below:
After making the correct selections, the customer clicks Next to continue.
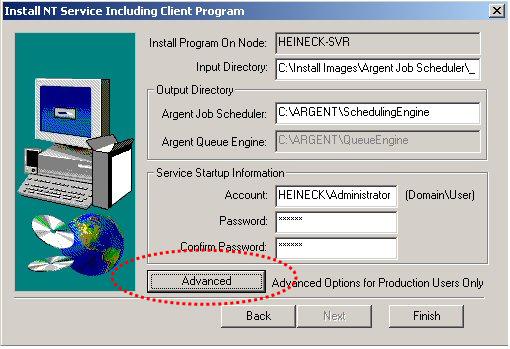
The Install NT Service Including Client Program window is displayed. The customer must leave the Input Directory and Output Directory unchanged. The customer then must provide the account name and password information for the user account which will be used to start the Argent Job Scheduler services. An example is shown below:
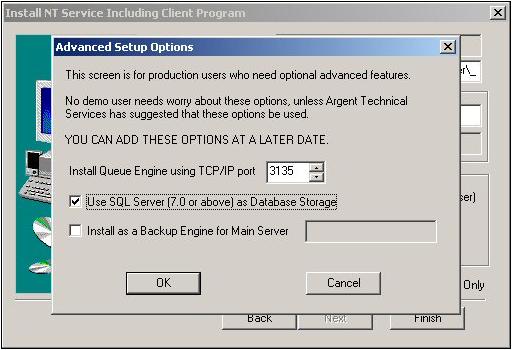
The customer must click Advanced to view and complete the prompts needed to install the support for using SQL Server as a backend database.
The Advanced Setup Options window is displayed.
The customer selects Use SQL Server (7.0 or above) as Database Storage then clicks OK to continue.
The Install NT Service Including Client Program window is re-displayed. The customer then clicks Finish to complete the prompts and continue with the re-installation of the Argent Job Scheduler scheduling engine.
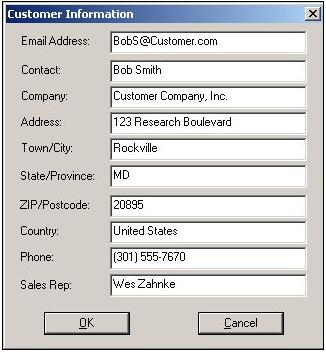
The Customer Information window is displayed as shown below:
The customer types the appropriate contact information and then clicks OK to continue.
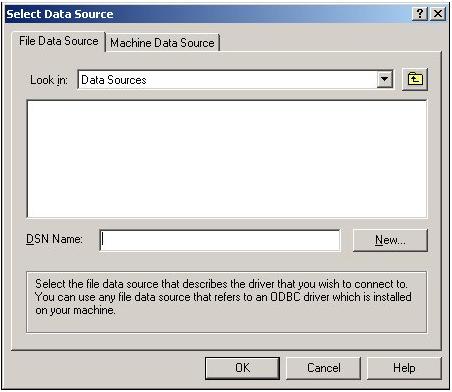
The Select Data Source window is displayed as shown in the example below:
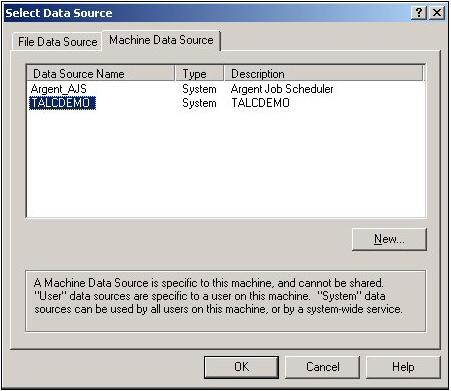
The customer must click the Machine Data Source tab. The customer then selects the appropriate ODBC Machine DSN as shown in the example below:
The customer then clicks OK to continue.
A warning message is displayed prompting the customer to confirm overwriting the existing data in the database. This is appropriate since the data was backed up prior to re-installing the Argent Job Scheduler scheduling engine.
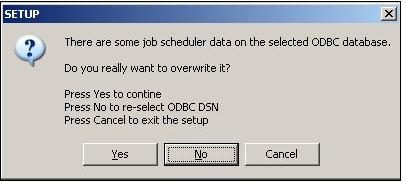
The customer clicks Yes to continue and overwrite the existing data
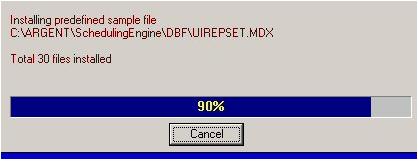
A progress indicator window is displayed while the Argent Job Scheduler scheduling engine files are re-installed.
When the re-installation processing is complete, a confirmation message is displayed as shown below:
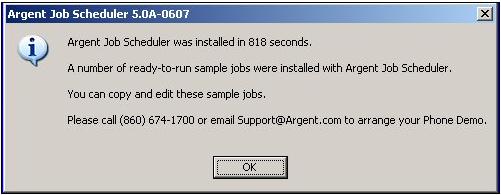
The customer then clicks OK to complete the re-installation.
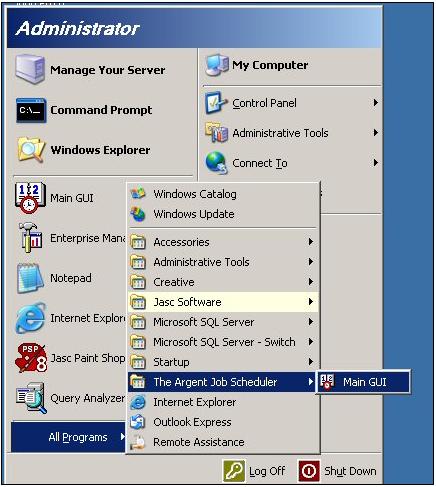
The customer then starts the Argent Job Scheduler main GUI in the normal manner by clicking Start->All Programs->Argent Job Scheduler->Main GUI as shown in the example below:
When the Argent Job Scheduler main J1 display is shown, the customer clicks System from the main menu bar then clicks Restore Database as shown below:

A confirmation window is displayed prompting the customer to stop the Argent Job Scheduler service. An example is shown below:
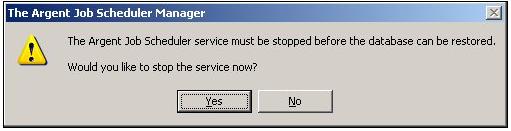
The customer clicks Yes to continue and stop the Argent Job Scheduler service.
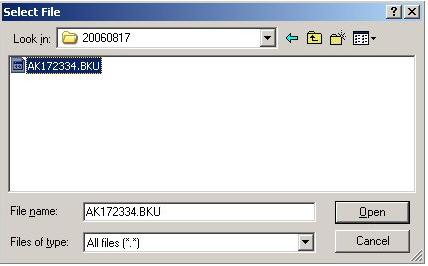
The Restore The Argent Job Scheduler Database window (Screen ID J50) is displayed. The customer clicks the ellipses to navigate to the location of the saved database files. An example is shown below.
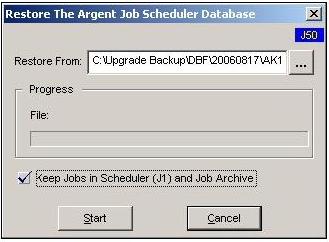
The customer clicks Open to confirm the backup file selection and continue. The Restore The Argent Job Scheduler Databasewindow (Screen ID J50) is re-displayed. The customer selects Keep Jobs in Scheduler (J1) and Archive then clicks Start to continue. An example is shown below:
When the files backed up previously have been restored, the customer is prompted to restore registry settings as shown below:
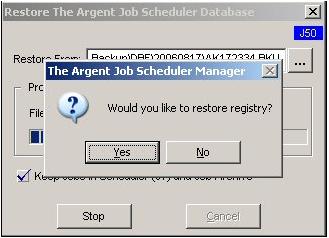
The customer clicks Yes to continue.
A confirmation message is displayed when the registry has been restored and the database restore processing is complete.
The customer then re-starts the Argent Job Scheduler service in the normal manner as shown in the example below:

The customer can then resume normal operations using the Argent Job Scheduler.
|
Your Argent Job Scheduler is a critical production system, the well-being of which directly affects large segments of your IT operation. Feel free at any time, day or night, 24 hours-a-day, 365 days-a-year to contact Argent
|