Exercise 1-Creating A Job Template
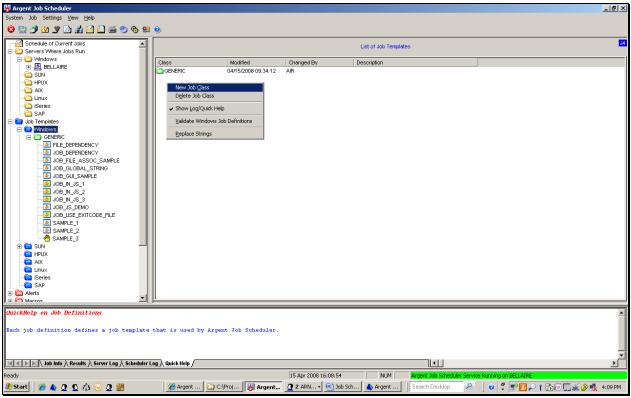
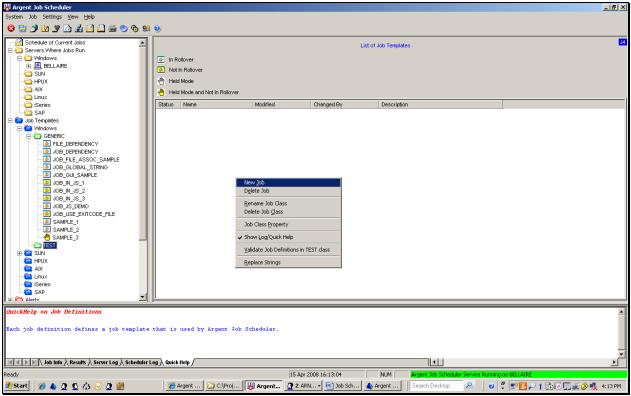
To create a new job class, right click the Windows folder located under the Job Templates folder in the tree view, and select new job class.
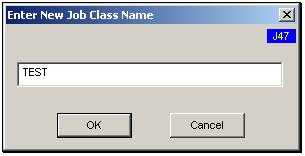
Enter a name for the new job class
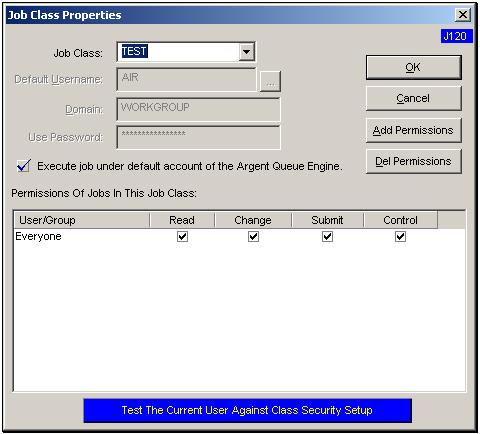
Make the appropriate selections for the Job Class Properties
With the new job class created and selected, right click and select New Job
Fill out the Job Definition Wizard
-
Job Name
-
Command File (file to execute .cmd, .bat, .exe, etc.)
-
Parameters
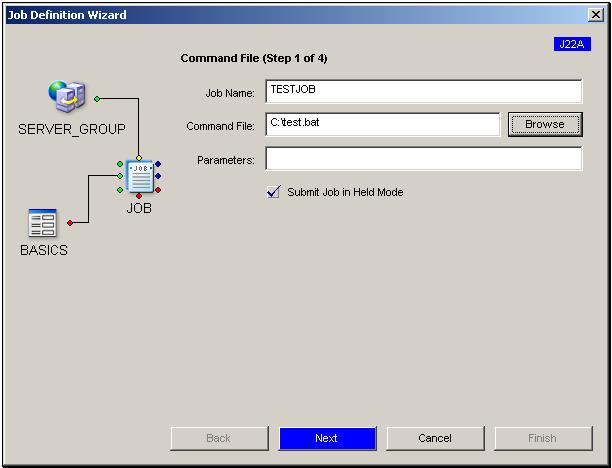
Click Next
Select the account credentials for the job to execute as.
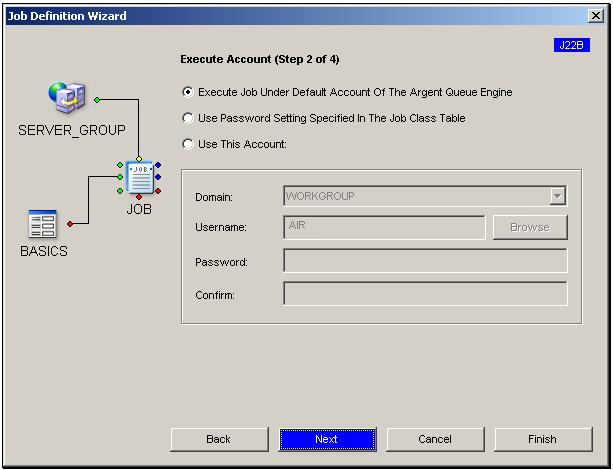
Click Next
Select the Queue Engine and Queue for the job to run on:
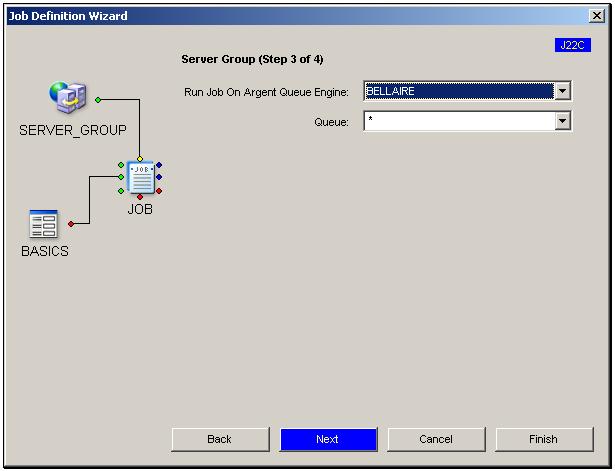
Click Next
Select the start time and the frequency you wish to execute the job
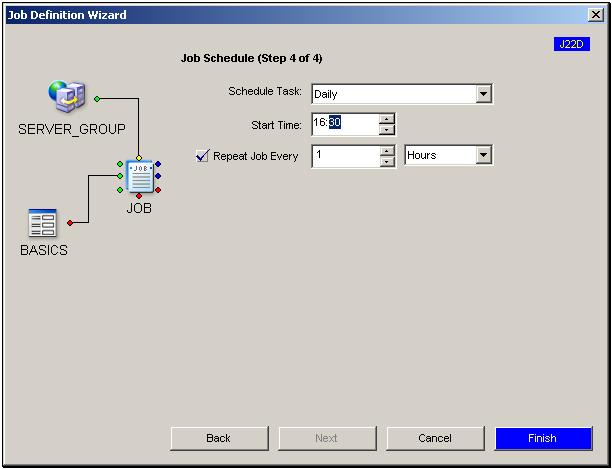
Click Finish
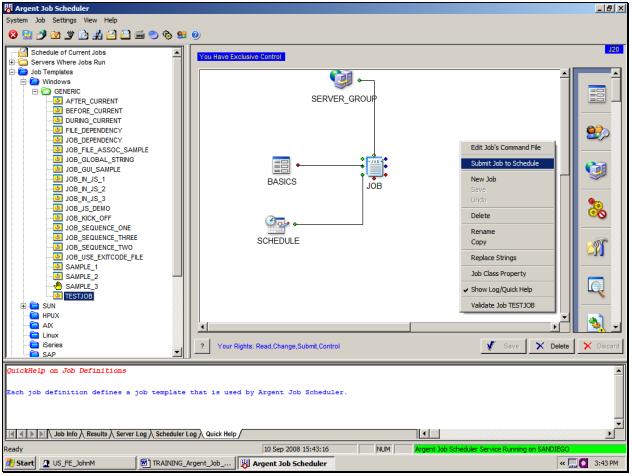
After your new job has been created, a good exercise is to use the right-click option to “Submit Job to Schedule”:
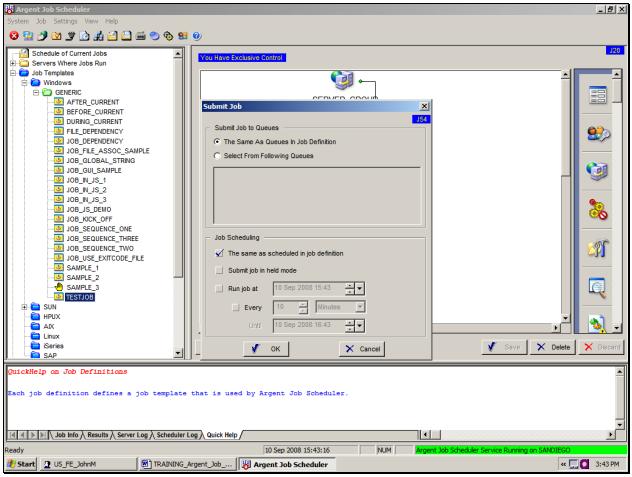
A pop-up gives you the option to edit the schedule time for that one particular ad-hoc job instance, or to use the same schedule that is defined in the job definition:
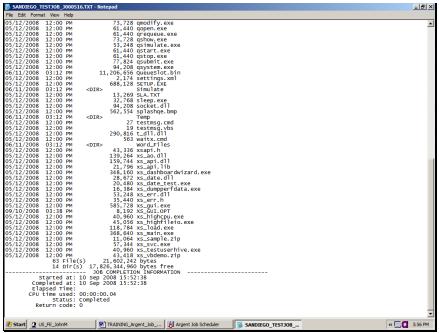
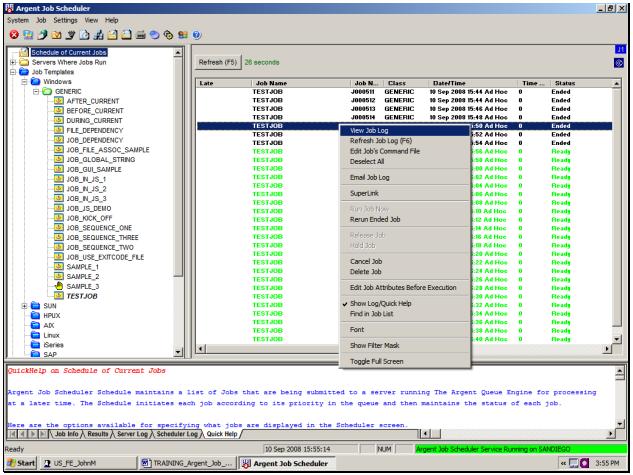
When the job is submitted, it will automatically navigate to the main Schedule screen in the Job Control Panel. You can then view the status of the instances of your submitted job. When the job has completed, it will show a status of ‘Ended’, at which time you can use the right-click option to ‘View job Log’:
The Job log will display a notepad log summarizing which account submitted the job, which account it ran under, the time the job was submitted, the command file that was executed, and any command line output generated by the job:
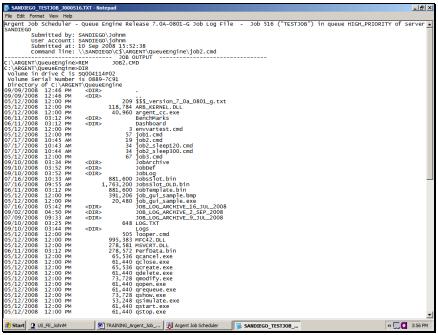
The end of the job log will display how long the job ran for, as well as it’s Status and Return Code information: