KBI 312064 Accessing Argent Omega Via HTTPS By Deploying Argent Reverse Proxy Web Server
Version
Argent Omega 2.2A-2307-A and above
Date
Monday, 7 August 2023
Technical Background
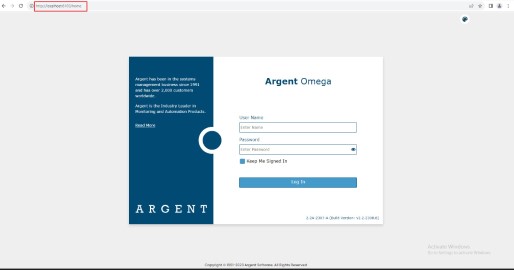
With default installation, the product web console is accessible locally via HTTP protocol on port 6100.
Example — http://localhost:6100
Argent Omega service is implemented as self-hosted web server. As a fully functional web server, it is fine to use within an intranet environment, it is not recommended to directly expose to Internet.
Reverse Proxy web server is deployed to protect from potential hacking.
Reverse Proxy web service can be implemented using any industry strength web server including IIS, NGINX, Apache, etc. Argent Omega bundles NGINX 1.17.10 to serve the purpose.
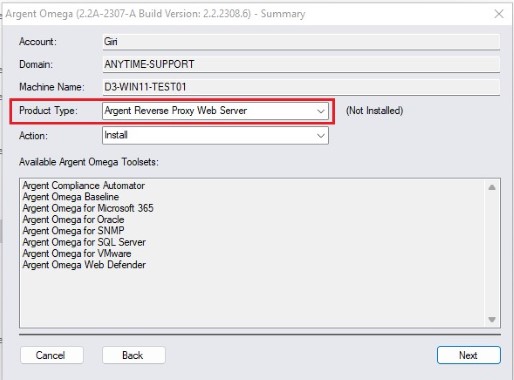
After installing Argent Omega Primary Generator, run Argent Omega setup again to install Argent Reverse Proxy Web Server.
Then, select Argent Reverse Proxy Web Server as Product Type as shown below:
Click the Next button to install the Argent Reverse Proxy Web Server.
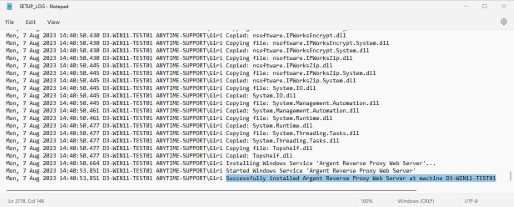
The setup log shows “Successfully installed Argent Reverse Proxy Web Server at machine
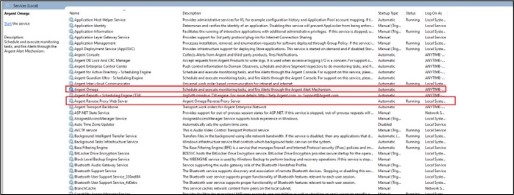
Also, a successful installation will automatically register and start Argent Reverse Proxy Web Server as a Windows Service.
Argent Reverse Proxy Web Server listens both HTTP (Port: 80) and HTTPS (Port: 443)
Reverse proxy always automatically redirects all HTTP visits to HTTPS.
Example: Argent Omega URLs are https://{MACHINE_NAME} or http://{MACHINE_NAME}
Argent Omega web console is now accessible via HTTP (Port 80) and HTTPS (Port 443) protocols.
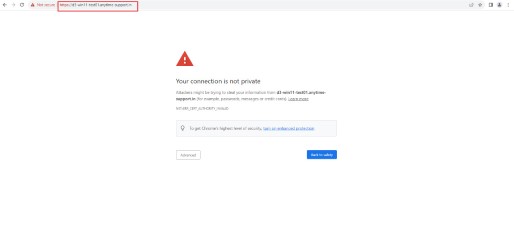
For example, http://d3-win11-test01.anytime-support.in and https://d3-win11-test01.anytime-support.in
Since web browser does not recognize the self-signed certificate generated by Argent Omega
Thus, with default installation, warning about Your connection is not private will be displayed.
It is safe to proceed
Many famous products in the industry behave the same way, such as Windows RDP, VMware vSphere Web Client, etc.
It is perfectly fine to use self-signed certificate for internal usage as the certificate is genuinely generated by the trusted Argent Omega service.
For training, engineer to be aware of how to get rid of the above warning and that will be covered in next section.
By default, Argent Omega’s self-signed SSL certificate is under C:\{Argent Omega Home Directory}\CERT\
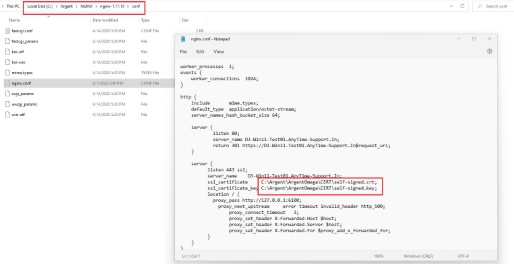
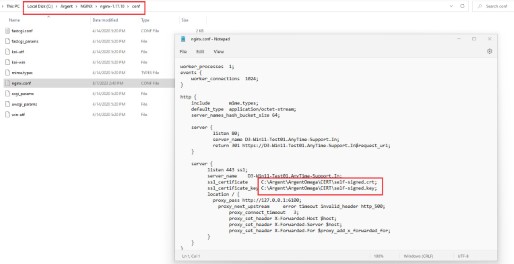
Certificate path is defined in NGINX configuration file C:\Argent\NGINX\nginx-1.17.10\conf\nginx.conf
Argent Omega works with SSL certificate in the form of two files, meaning one SSL cert has two files:
1. Public key (*.CRT)
2. Private key (*.KEY)
File extension is required for both files.
Install Trusted Certificate Signed by Certificate Authority (CA)
Web server certificate is commonly known as SSL certificate in the industry. This section applies to scenario below:
1. Customer is already running a Certificate Authority (CA) server and can sign new certificate.
2. Customer purchased SSL certificate from vendors, such as Verisign, Sectigo, etc.
As mentioned above, Argent Omega works with SSL certificate using following two files:
1. Public key (*.CRT)
2. Private key (*.KEY)
If SSL certificate was downloaded as single file, or known as a “combined key format”, such as PFX, PEM file extensions, engineer will then need to export them to xxxx.crt and xxxx.key pair.
If SSL certificate was downloaded as two files, it will be fine even file extension is in *.PEM.
Steps To Update SSL Certification In Argent Omega (Ensure both *.CRT and *.KEY files are ready)
1. Stop Argent Omega service.
2. Place new certificate files in CERT folder, for example C:\Argent\ArgentOmega\CERT
3. Edit C:\Argent\ArgentOmega\ArgentOmegaMain.exe.config
This enables support for self-signed certificates. If already enabled, do nothing and close editor.
4. Restart Argent Omega service. Check service log to verify certificate is accepted by service.
5. Stop service for Argent Reverse Proxy Web Server
6. Edit C:\Argent\NGINX\nginx-1.17.10\conf\nginx.conf and update new path for new certificate files.
7. Restart service for Argent Reverse Proxy Web Server.
See next section to create Trusted self-signed SSL certificate at NO COST.
Create Trusted Self-Signed SSL Certificate at No Cost
Other than buying SSL certificate, Let’s Encrypt Certificate is a popular alternative at No Cost
This type of SSL Certificate is valid for 3 months and can be automatically renewed at No Cost
CertBot (Beta) is the only option found so far for Windows to create Let’s Encrypt Certificate
Full description available via https://certbot.eff.org/instructions?ws=nginx&os=windows
Before starting, create a public Domain Name DNS record for Argent Omega portal.
For an example, OmegaDemo.YourDomainName.com
The DNS record must be resolved into Public IP Address of Argent Omega server.
For this training, it is the Azure VM’s public IP address.
The above is a prerequisite for Let’s Encrypt to verify the validity of web service.
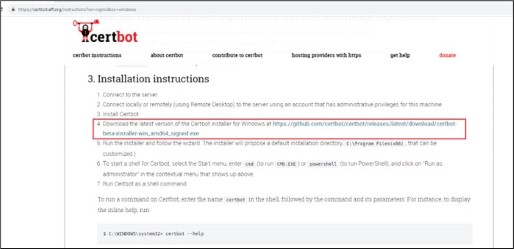
Download Certbot from https://certbot.eff.org/instructions?ws=nginx&os=windows
The setup package is about 17MB, execute file for installation.
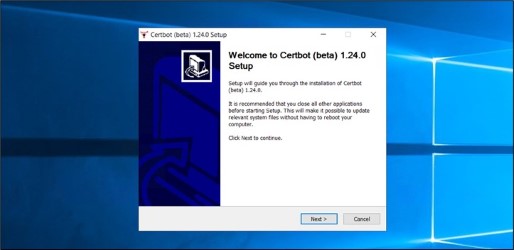
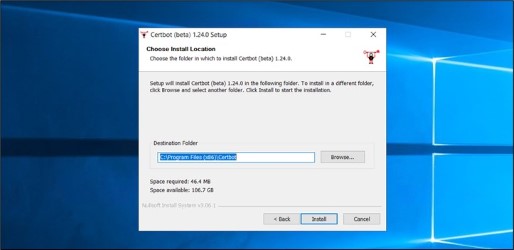
Double click the setup file and click Next to continue.
Leave destination folder unchanged, click Install to continue
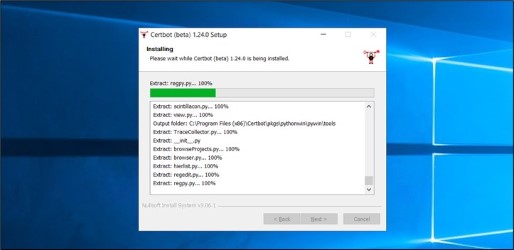
Installation in progress. It takes about 2 minutes
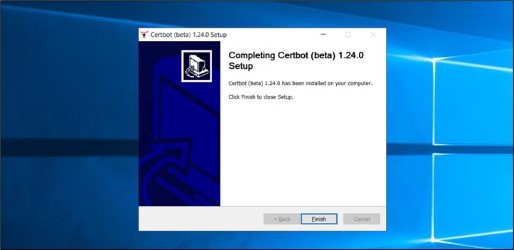
Installation successfully completed, click Finish to close. No reboot is required
Stop service only for Argent Reverse Proxy Web Server
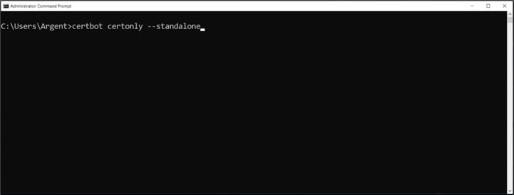
Open a new Windows Command Prompt as administrator
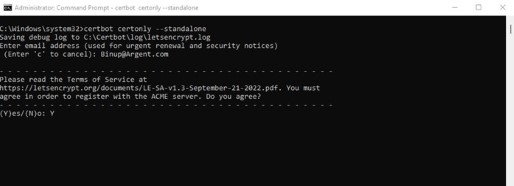
Execute command certbot certonly –standalone
Provide a valid email, then press Enter key
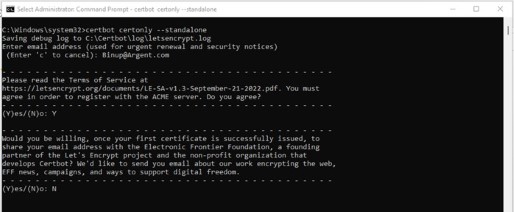
Agree terms by pressing “Y” key, then press Enter key
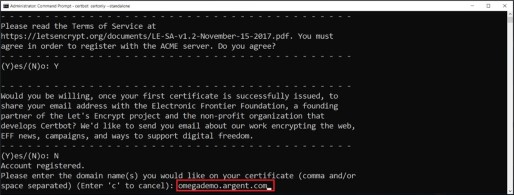
Decline sharing email address by pressing “N” key, then press “Enter” key
Specify DNS record mentioned earlier. For an example OmegaDemo.Argent.com
The value is case insensitive.
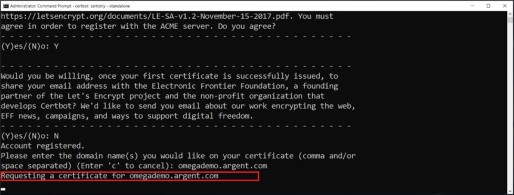
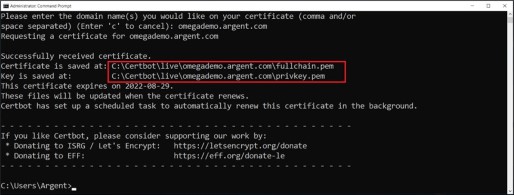
Certbot will automatically request a new certificate.
Certificate request completed successfully.
Note down the certifiate file paths, for updating nginx.conf file at later stage
Certificate is saved at: C:\Certbot\live\omegademo.argent.com\fullchain.pem
Key is saved at: C:\Certbot\live\omegademo.argent.com\privkey.pem
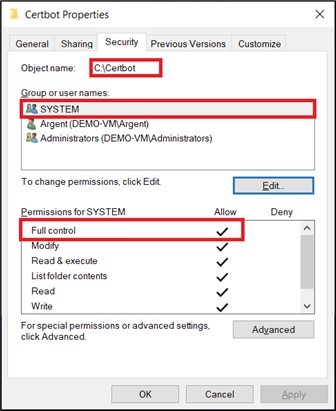
Browse folder properties for C:\Certbot. Ensure SYSTEM is allowed for Full control.
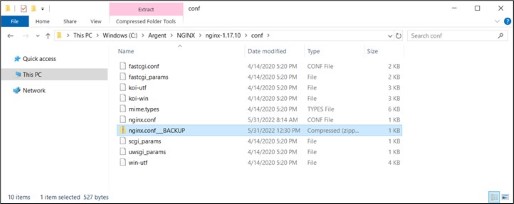
Navigate to C:\Argent\NGINX\nginx-1.17.10\conf.
Create a backup for file nginx.conf, for an example, zip it up.
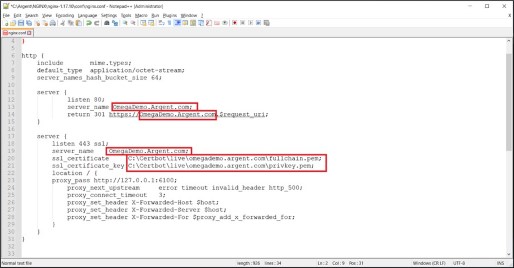
Edit file for C:\Argent\NGINX\nginx-1.17.10\conf\nginx.conf
Update value for server name, for example from D3-Win11-Test01.AnyTime-Support.In to OmegaDemo.Argent.com.
Updat file paths for both ssl_certificate and ssl_certificate_key match new paths noted earlier.
Review, then Save changes.
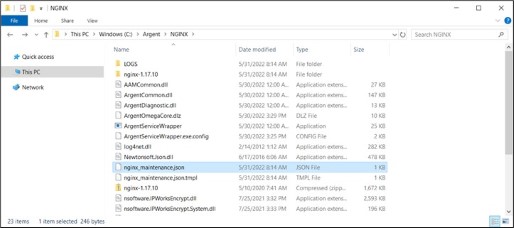
Navigate to C:\Argent\NGINX\.
Copy file nginx_maintenance.json.tmpl, then paste to the same folder.
Rename new file as nginx_maintenance.json.
Full path for the new file should be C:\Argent\NGINX\nginx_maintenance.json.
No further file editing needed.
This step will take care of certificate renewal.
Make sure Argent Omega service is still running at this point.
Start service for Argent Reverse Proxy Web Server.
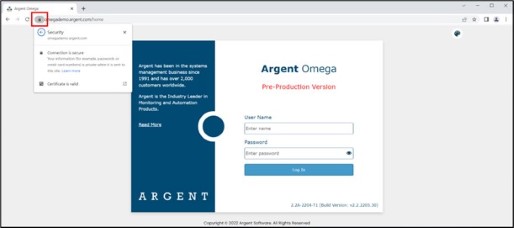
Using URL address OmegaDemo.Argent.com.
All browsers will now recognize the Agent Omega web console as secure with valid certifiate.
Repeat browsing test from another computer on internet for assurance.
Web security hardening for Argent Omega is now completed successfully.
Resolution
Upgrade to Argent Omega 2.2A-2307-A or above
