KBI 310844 Remote Installation Of Argent for Topology Agent
Version
Argent for Topology all versions
Date
Tuesday, 25 Feb 2014
Summary
Remote Installation of Argent for Topology Agent
Technical Background
Argent for Topology monitors and analyses network traffic by capturing NetFlow data from Cisco routers
The captured NetFlow data is analyzed and categorized to identify which users, applications, machines and departments are top consumers of bandwidth
An agent needs to be installed on all machines across the network being monitored
This document describes how to install Argent for Topology Agent remotely
As this remote installation procedure is made up on Group Policy and there are difference in the implementation of Group Policy in Windows 2003 and Windows 2008, this document is divided in to two sections, one for Windows 2003 and other for Windows 2008
Remote Installation of Argent for Topology Agent on a Windows 2003 Server
Step 1 – Install Argent for Topology Web Component
Once you have successfully installed this Web Component, you can find an MSI file –
ARGENT_FOR_TOPOLOGY_AGENT.MSI – in
C:\Argent\ArgentForTopology\ARGENT_FOR_TOPOLOGY_WEB\ARGENT_FOR_TOPOLOGY_AGENT_INSTALLER (the path where you have installed)
This MSI file is used for remote installation of Argent for Topology Agent
Step 2 – Create a Distribution Point
As we are discussing the remote installation using Group Policy, first you have to create a distribution point which is nothing but a shared folder in the domain server
Follow the steps:
- Log on to the server as an administrator
- Create a folder called ‘Argent_Topology_Agent‘
- Make the folder as shared
- Set permissions on the share to allow access to the distribution package
- Copy the MSI package to the distribution point
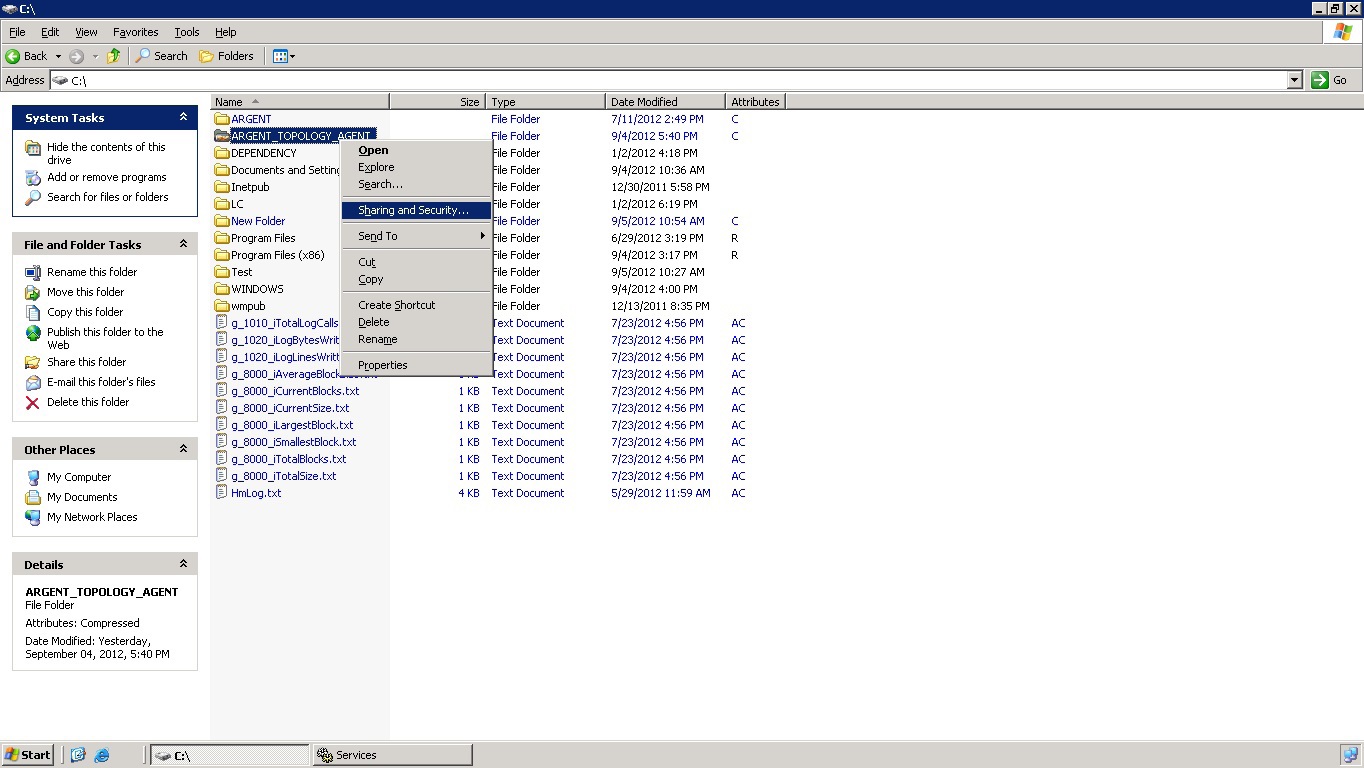
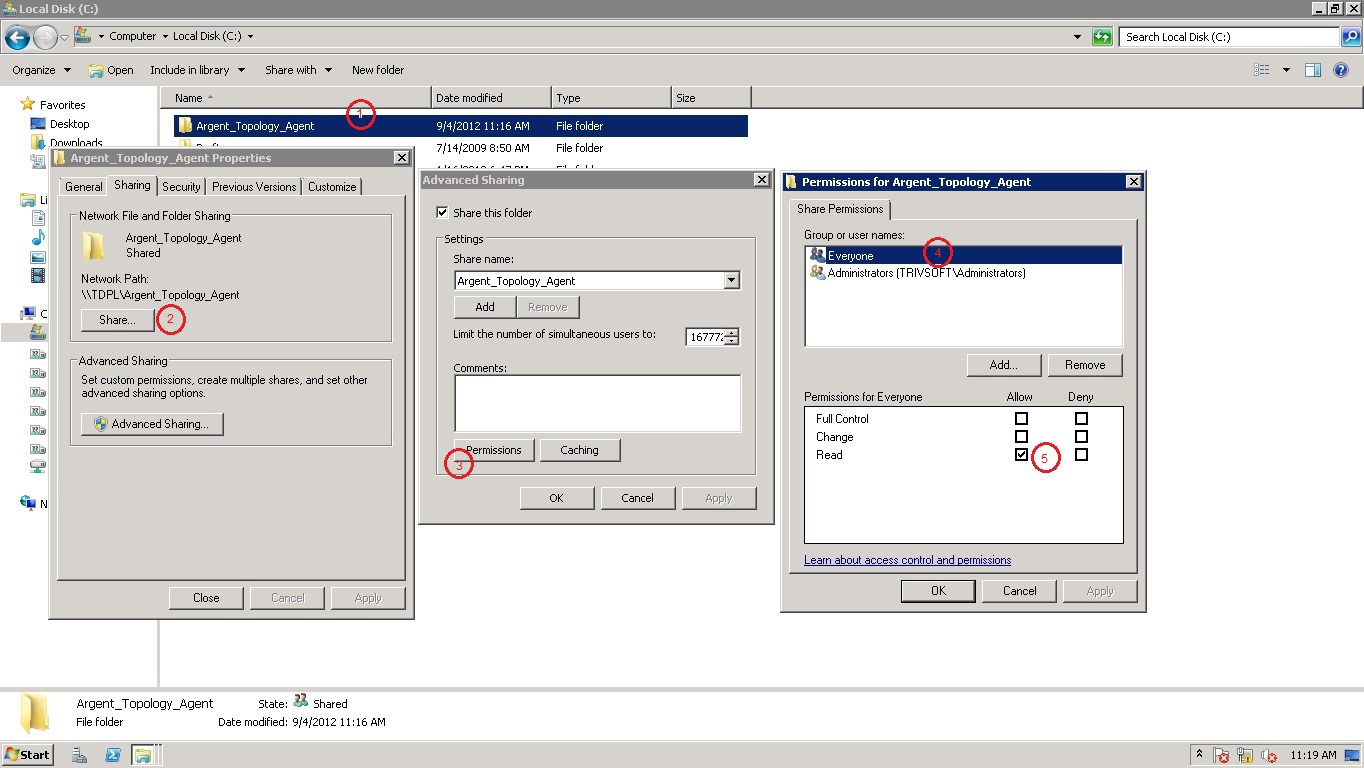
To make a folder shared, follow the steps:
- Select the folder to share
- Click Right mouse button and select ‘Sharing and Security‘ menu
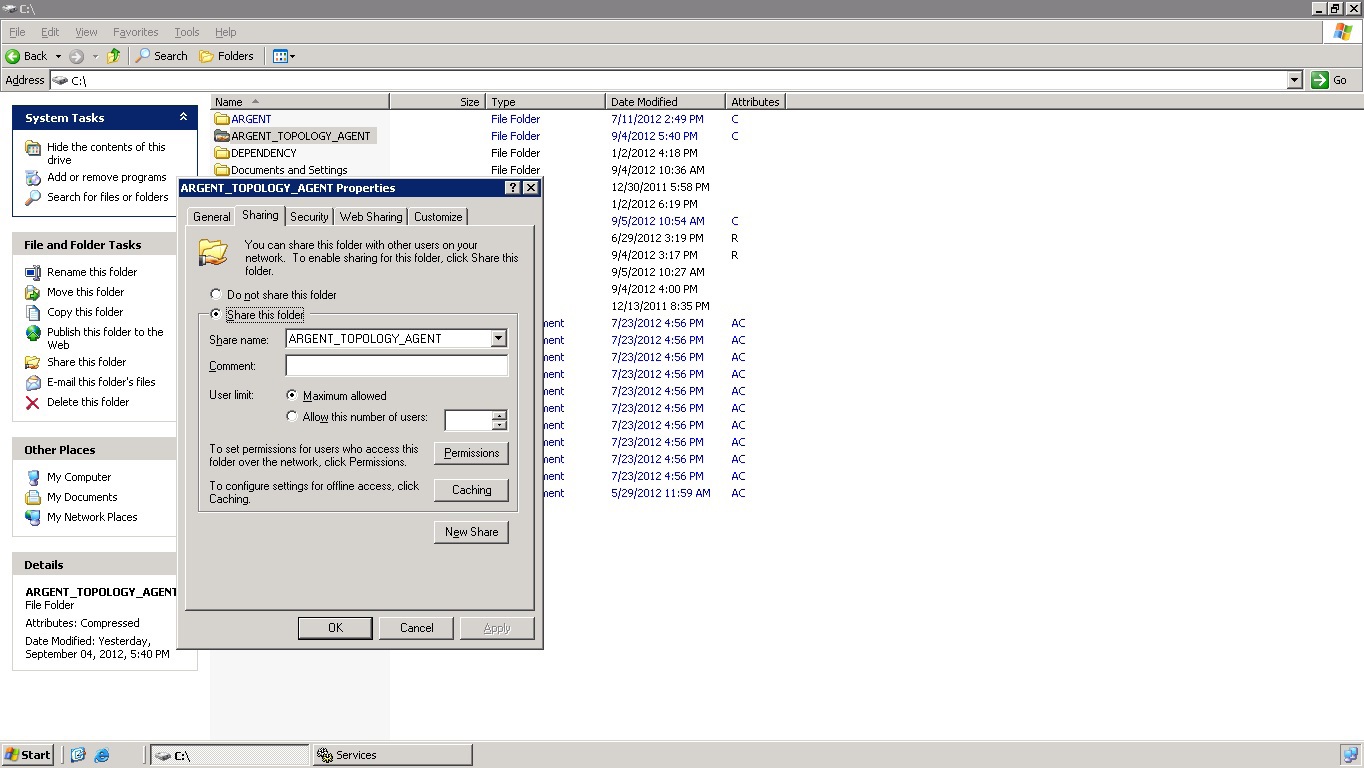
Select ‘Sharing‘ Tab
- Select ‘Share this folder‘
- Click ‘OK‘ button
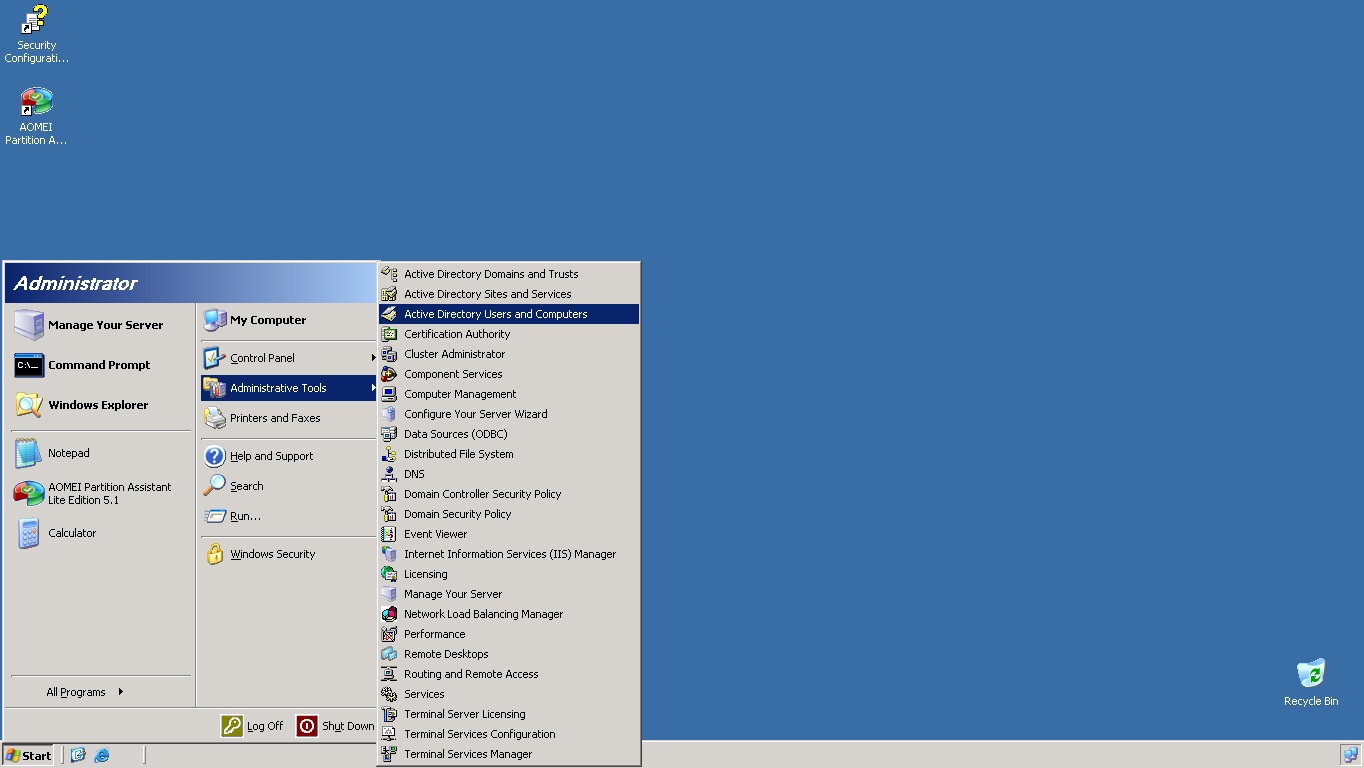
Step 3 – Open Active Directory Users and Computers
Start -> Administrative Tools -> Active Directory Users and Computers
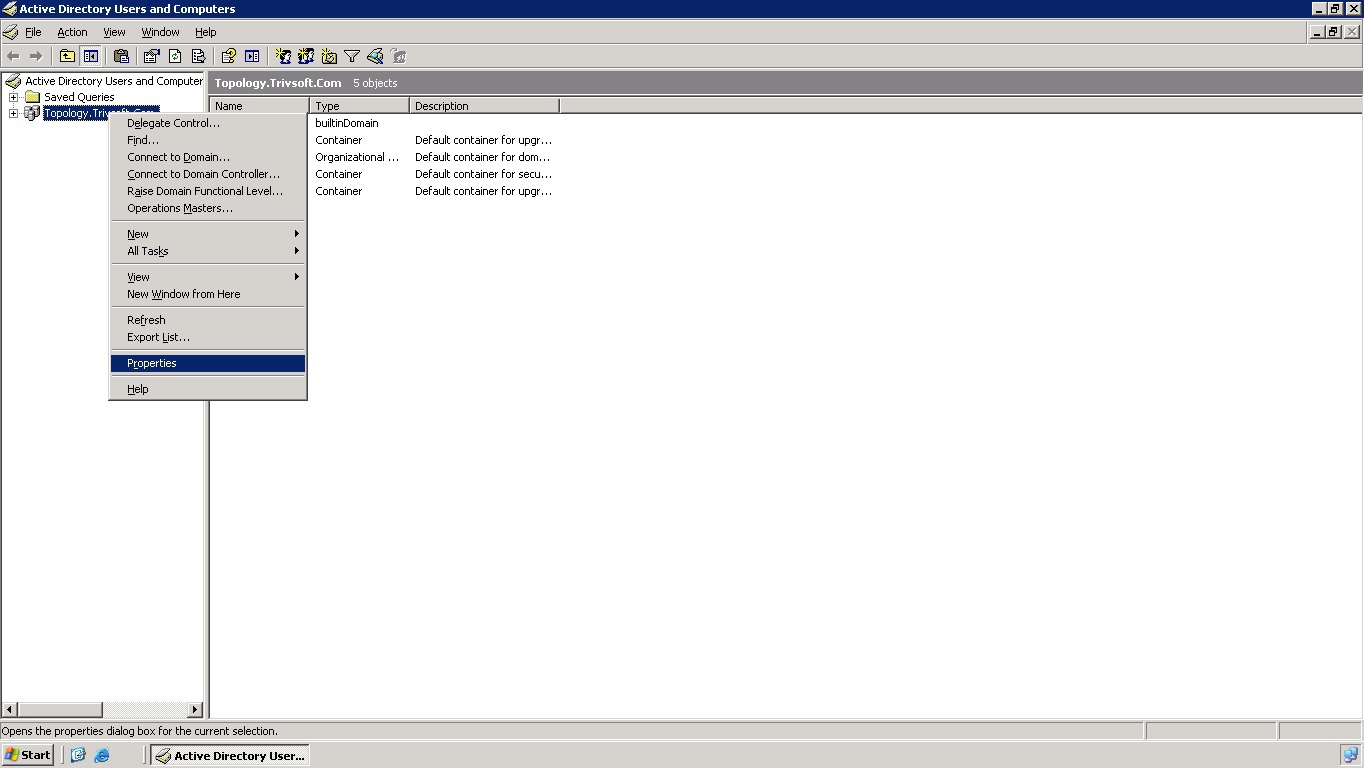
Step 4 – Open Properties of Domain
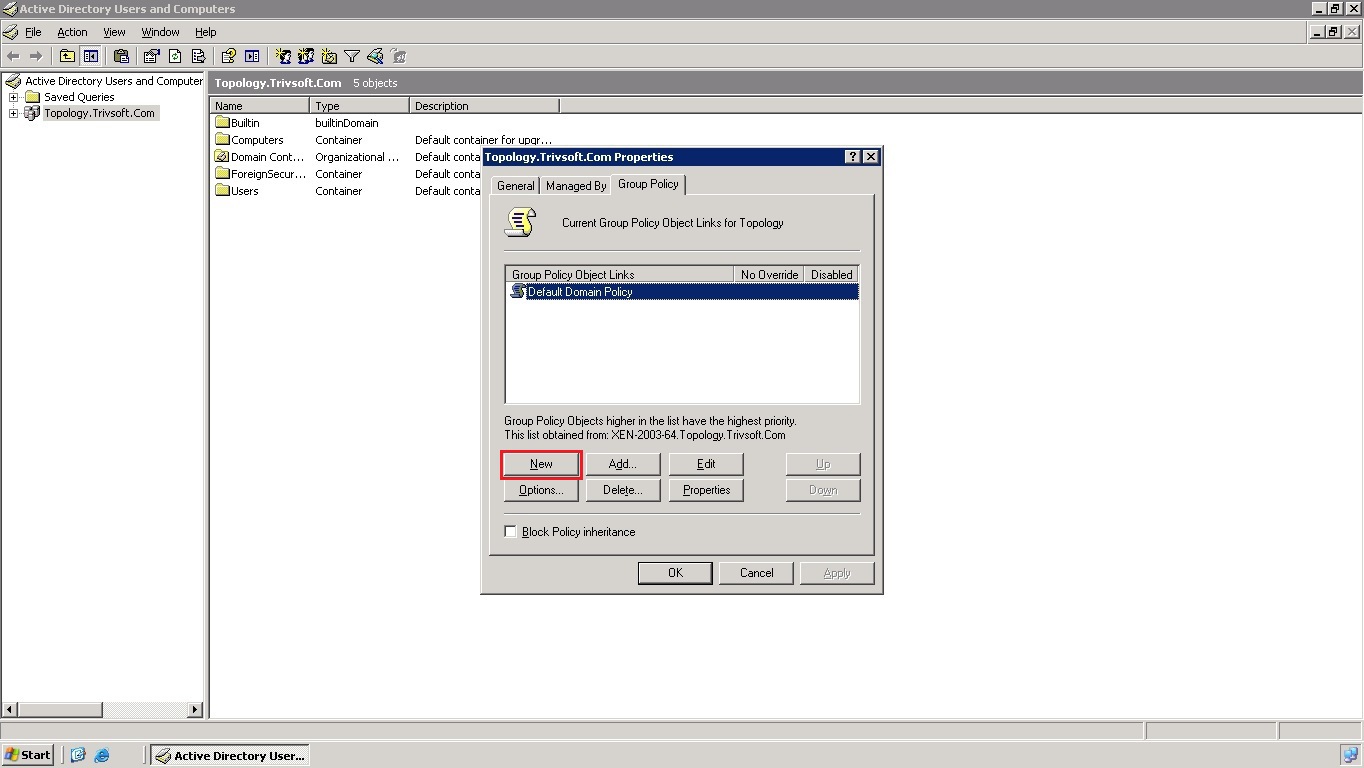
Step 5 – Add New Group Policy Object
- Select ‘Group Policy‘ tab
- Click on the ‘New‘ Button
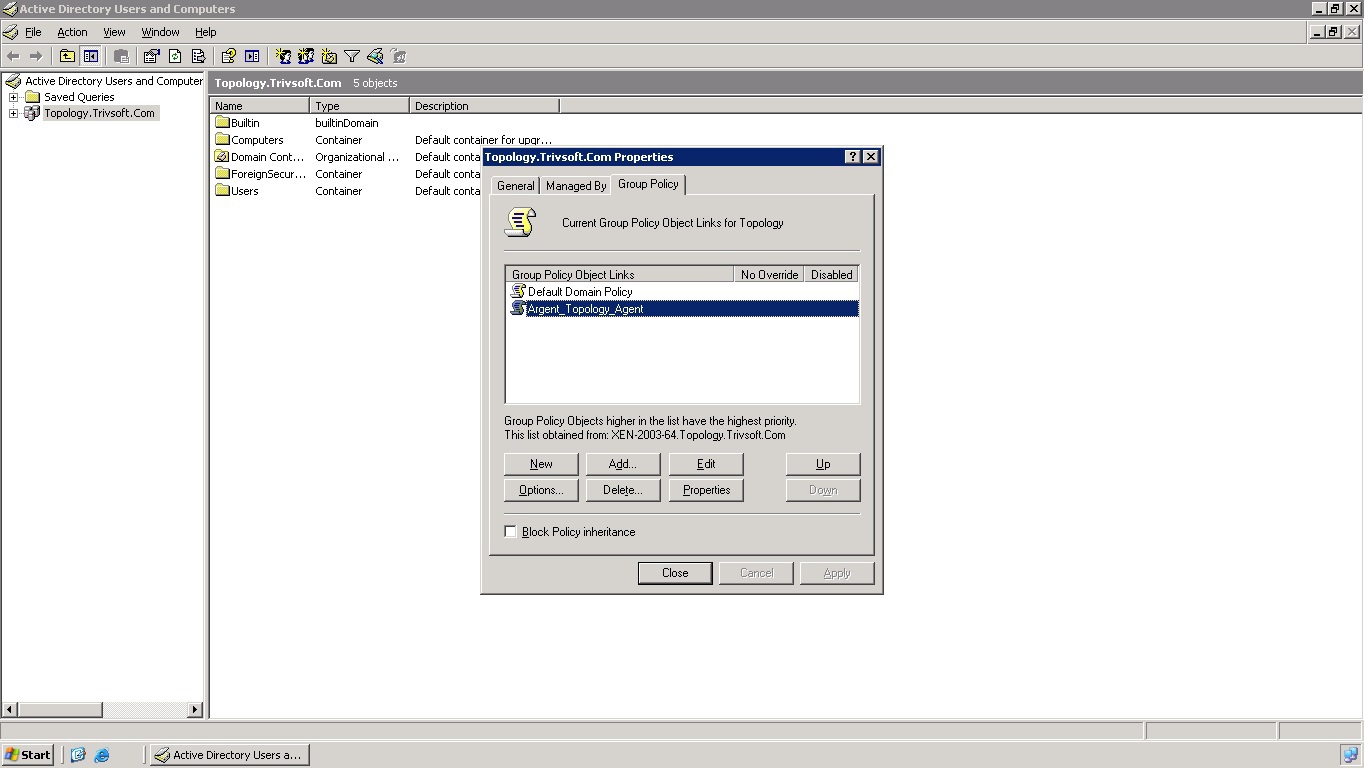
Step 6 – Name the Newly Created Group Policy Object (GPO) as ‘Argent_Topology_Agent‘
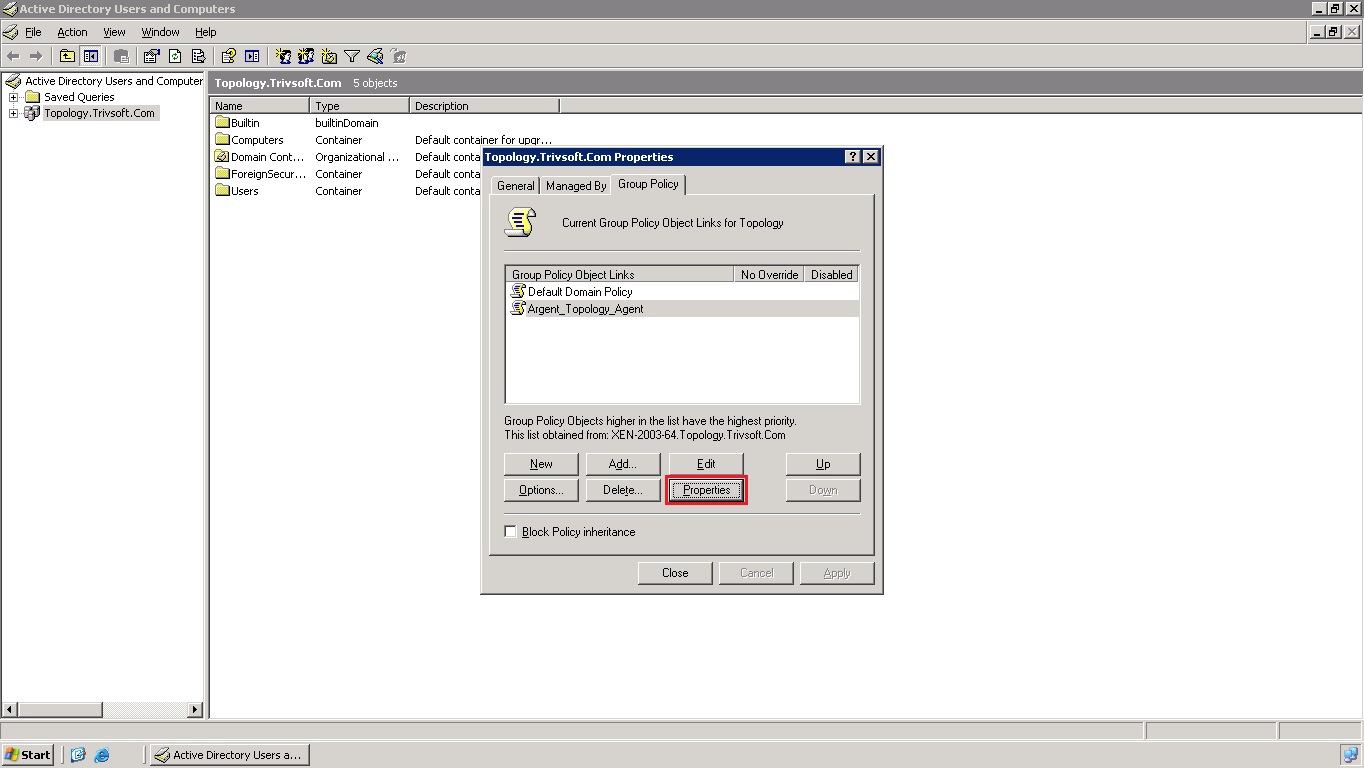
Step 7 – Configure the Properties of Newly Created GPO ‘Argent_Topology_Agent‘
- Select ‘Argent_Topology_Agent‘
- Click on ‘Properties‘ button
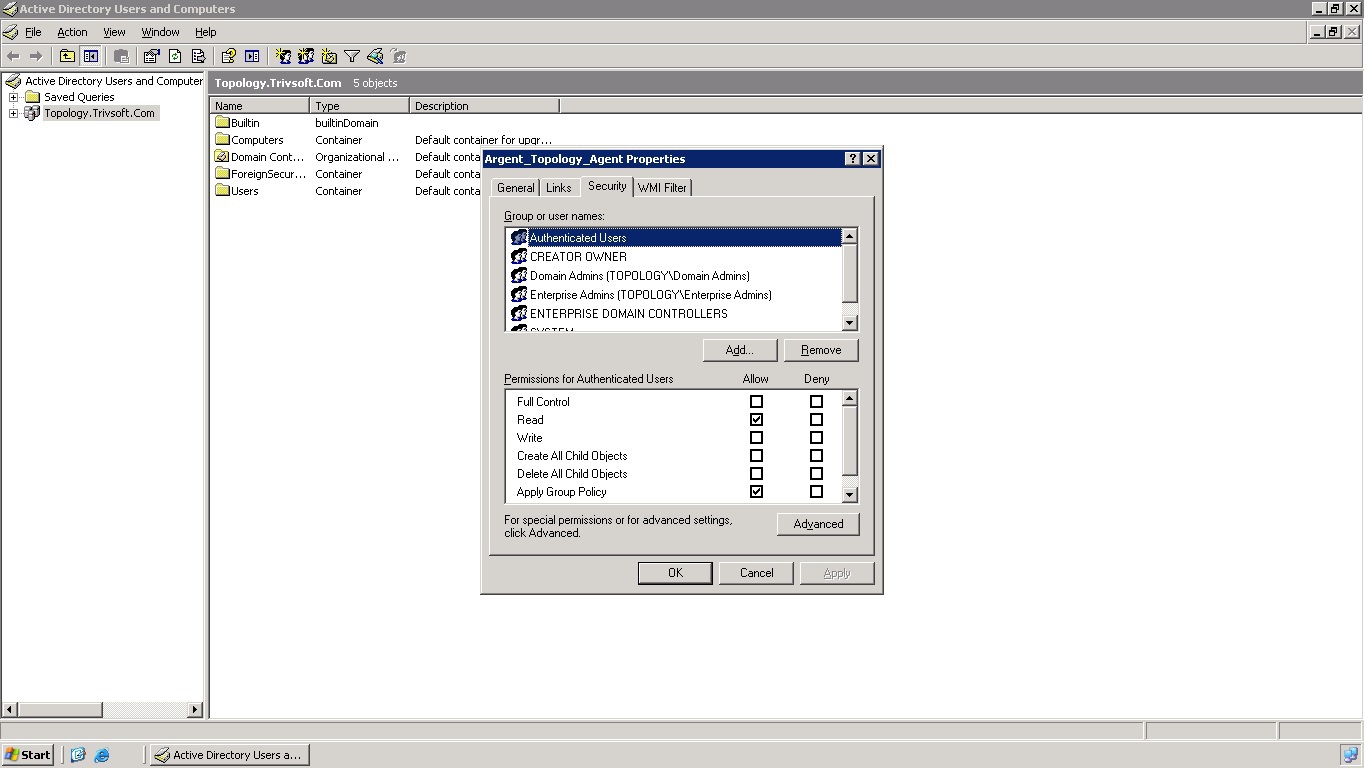
Step 8 – Configure Security
- Select ‘Security‘ tab
- Add or remove users who are required to apply this policy
- Set permissions
- Click ‘OK‘ button
Step 9 – Edit Group Policy Object
- Select ‘Argent_Topology_Agent‘
- Click on the ‘Edit‘ button
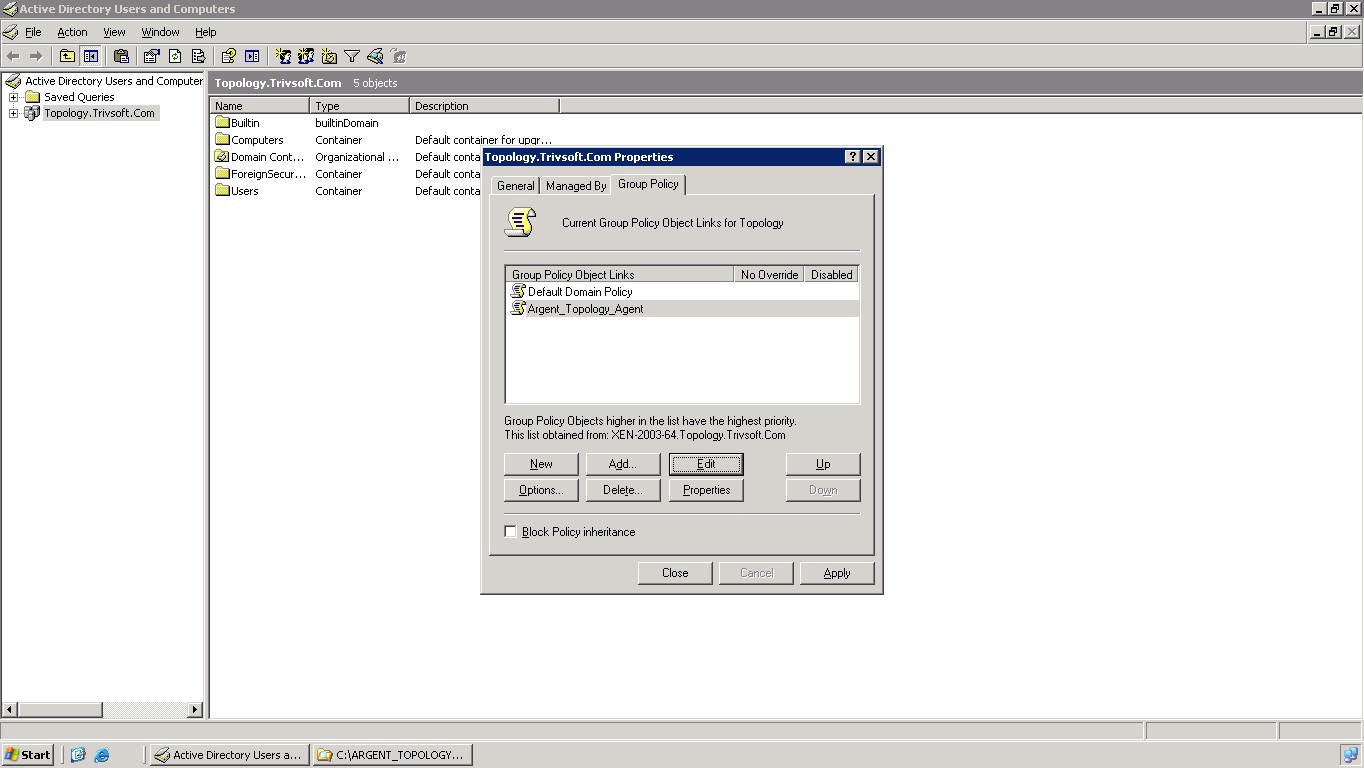
This step will open ‘Group Policy Object Editor‘
Step 10 – Set MSI package for This Group Policy
- Select User Configuration -> Software Settings -> SoftwareInstallation -> New -> Package
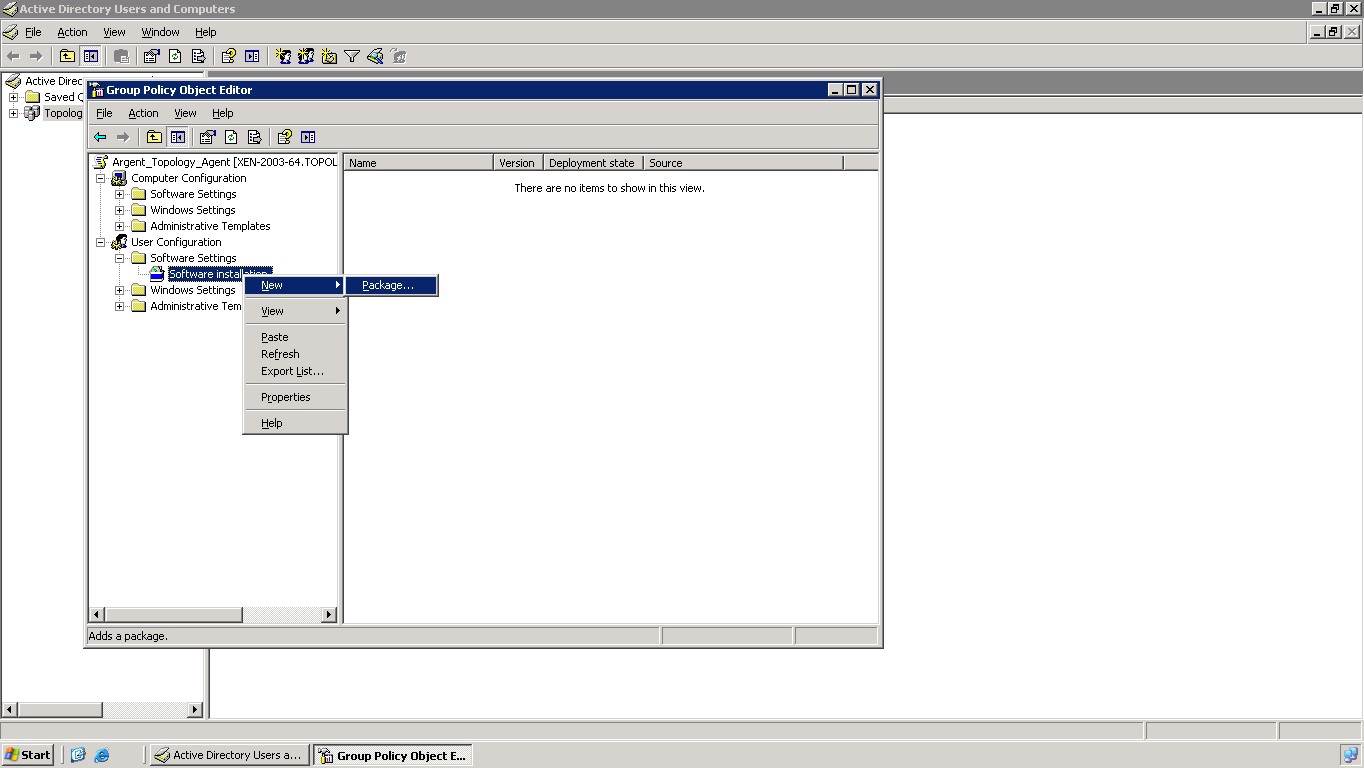
This will open a screen to select the MSI package
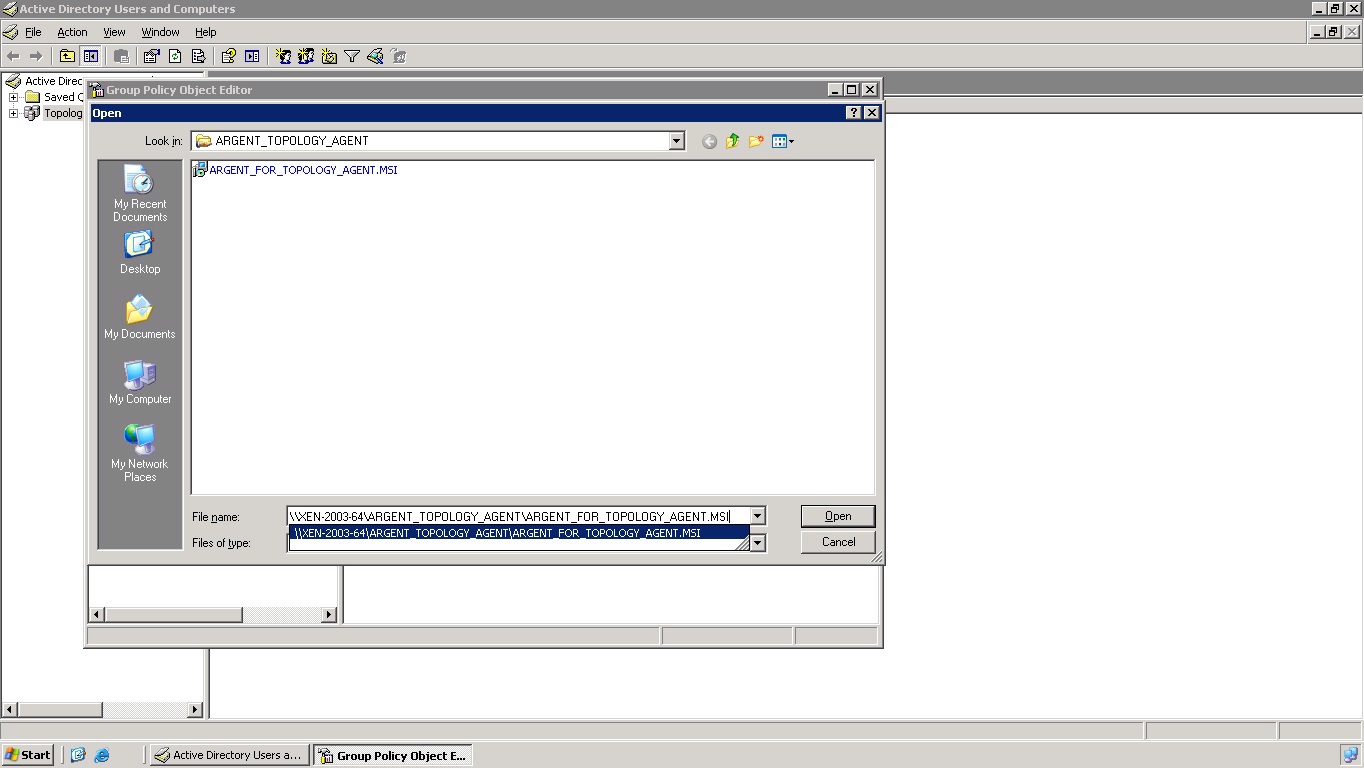
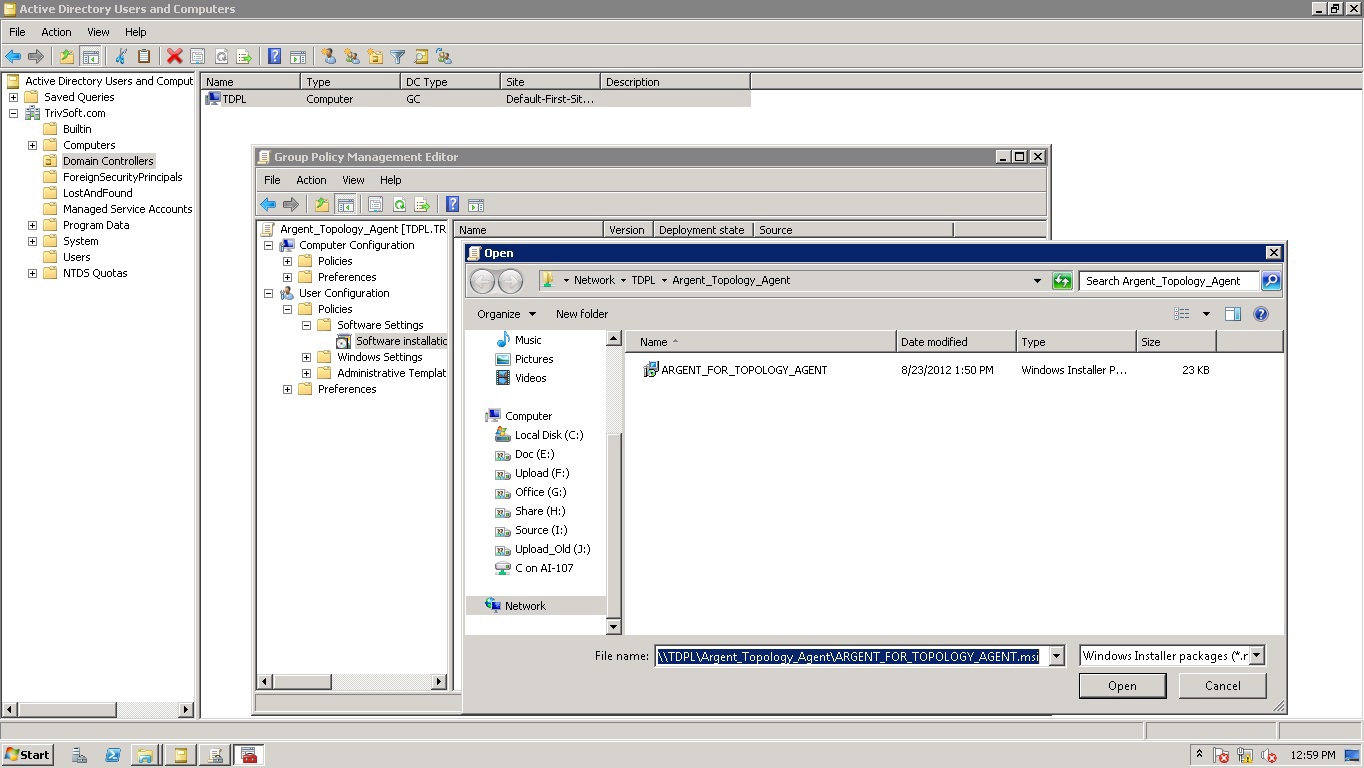
Step 11 – Set the Path of the Distribution Point
Please note that you must specify the UNC path of the shared installer package that you want
For example, \\server\ Argent_Topology_Agent\ ARGENT_FOR_TOPOLOGY_AGENT.MSI
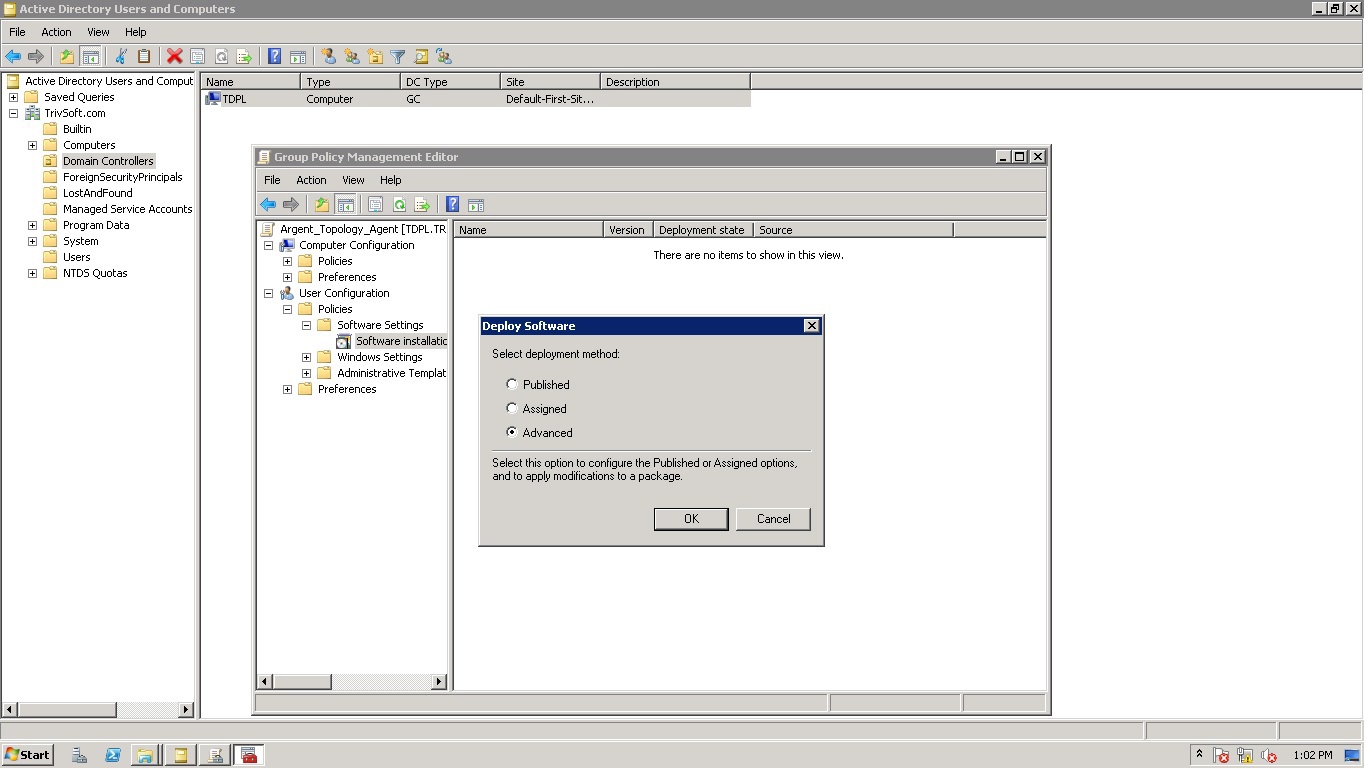
Step 12 – Select Advanced in Deploy Software
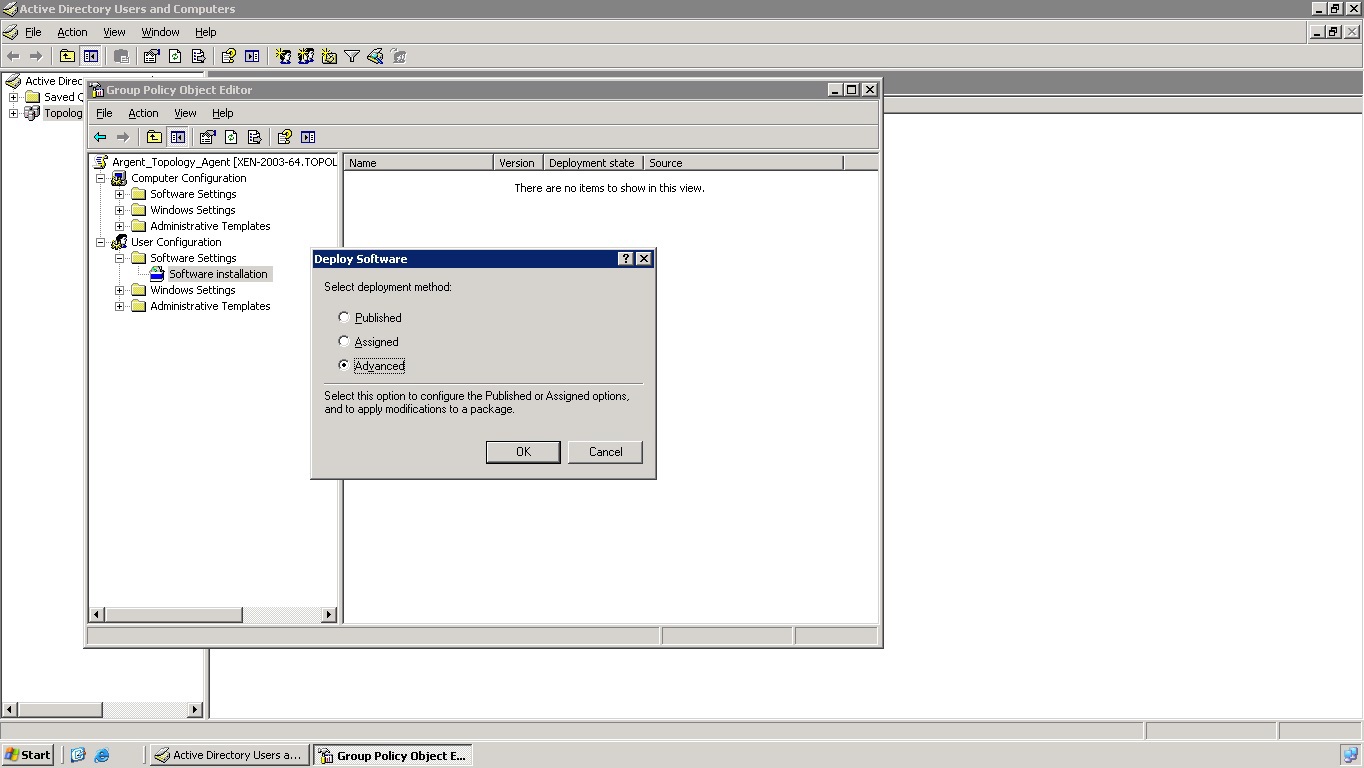
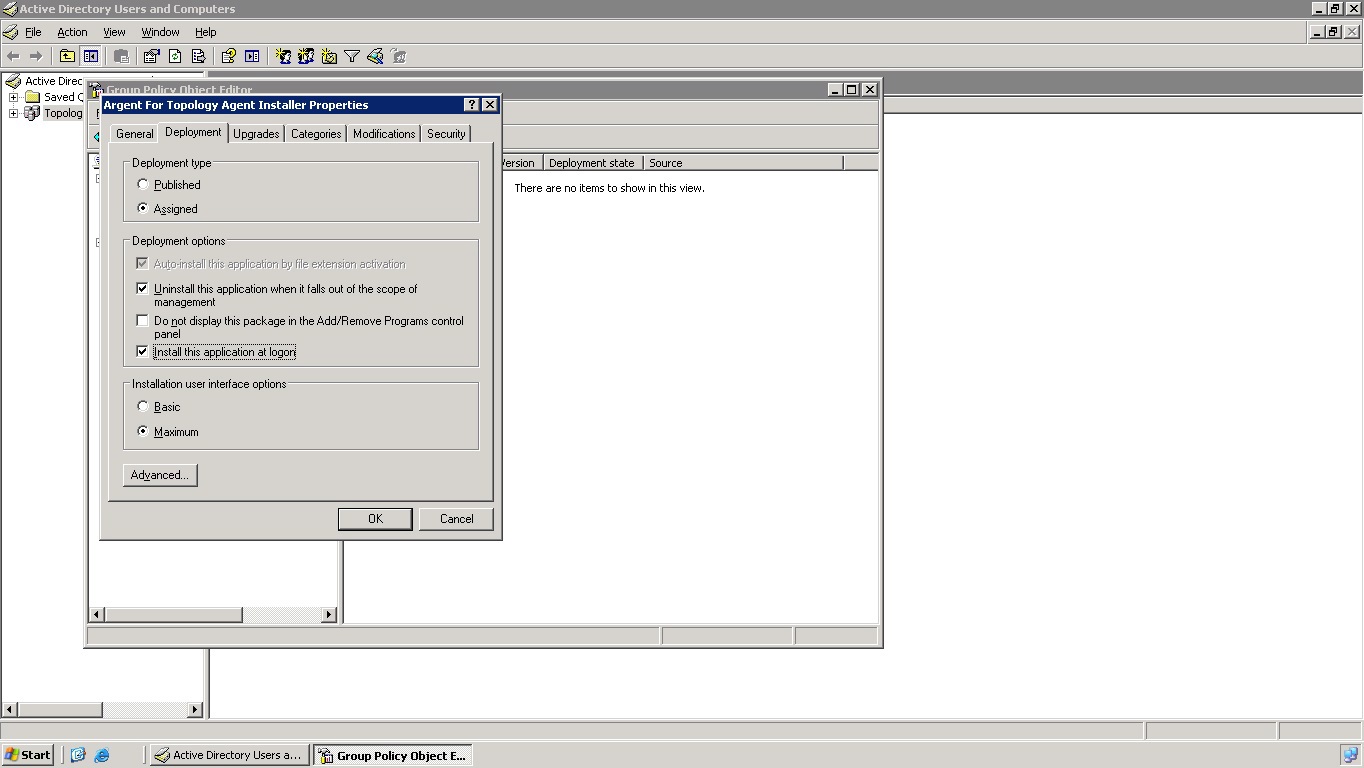
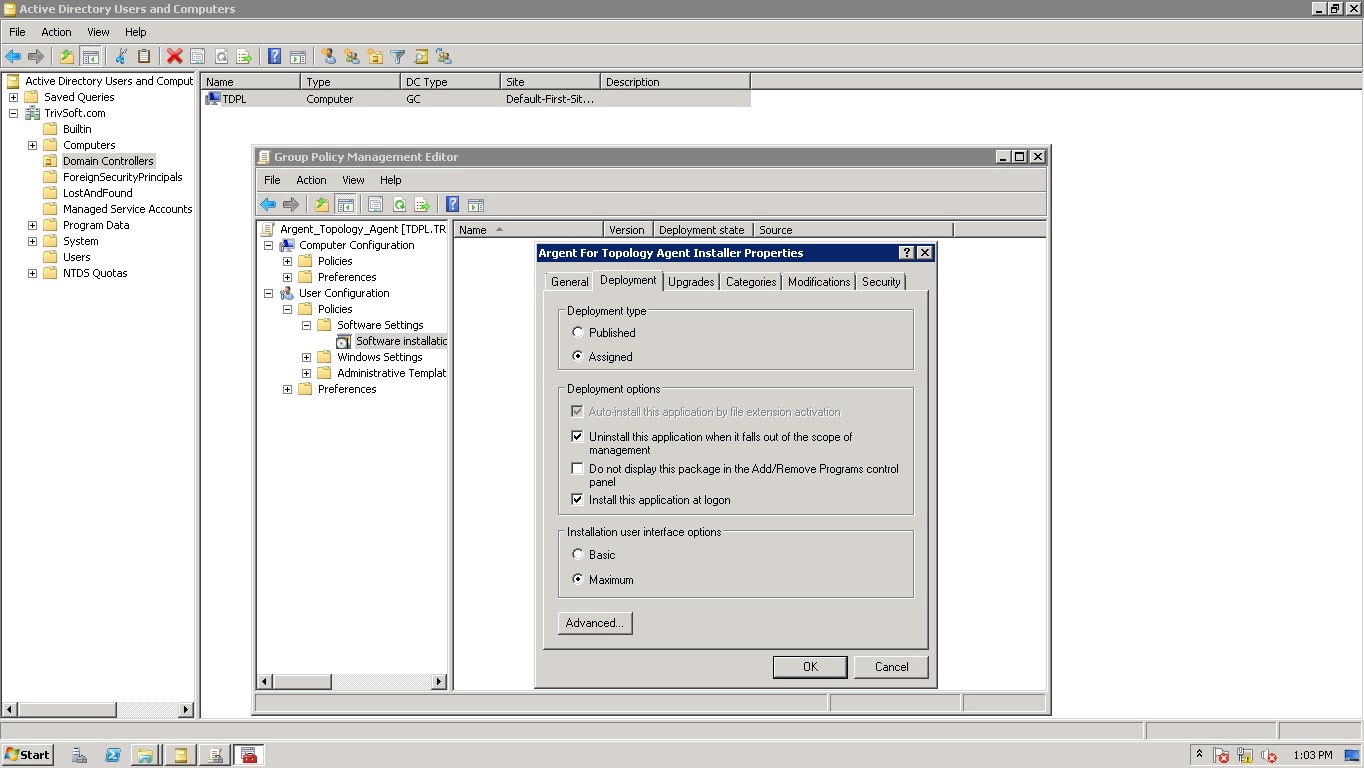
Step 13 – Configure Deployment Screen
- Select Deployment tab
- Select Assigned in Deployment Type
- Check ‘Uninstall the application when it fails out of the scope of management‘
- Check ‘Install the application at logon‘
- Select ‘Maximum‘ in ‘Installation user interface options‘
- Click OK button
You have successfully created a group policy to install Argent Topology Agent
Agent will get automatically installed on every machine where the users configured in the policy log on their machines
Remote Installation of Argent for Topology Agent on a Windows 2008 Server
Step 1 – Install Argent for Topology Web Component
Once you have successfully installed this Web Component, you can find an MSI file –
ARGENT_FOR_TOPOLOGY_AGENT.MSI – in
C:\Argent\ArgentForTopology\ARGENT_FOR_TOPOLOGY_WEB\ARGENT_FOR_TOPOLOGY_AGENT_INSTALLER (the path where you have installed)
You can download this file from the configuration page of Argent for Topology
Step 2 – Create a Distribution Point
As we are discussing the remote installation using Group Policy, first you have to create a distribution point which is nothing but a shared folder in the domain server
Follow the steps:
- Log on to the server as an administrator
- Create a folder called ‘Argent_Topology_Agent‘
- Make the folder as shared
- Set permissions on the share to allow access to the distribution package
- Copy the MSI package to the distribution point
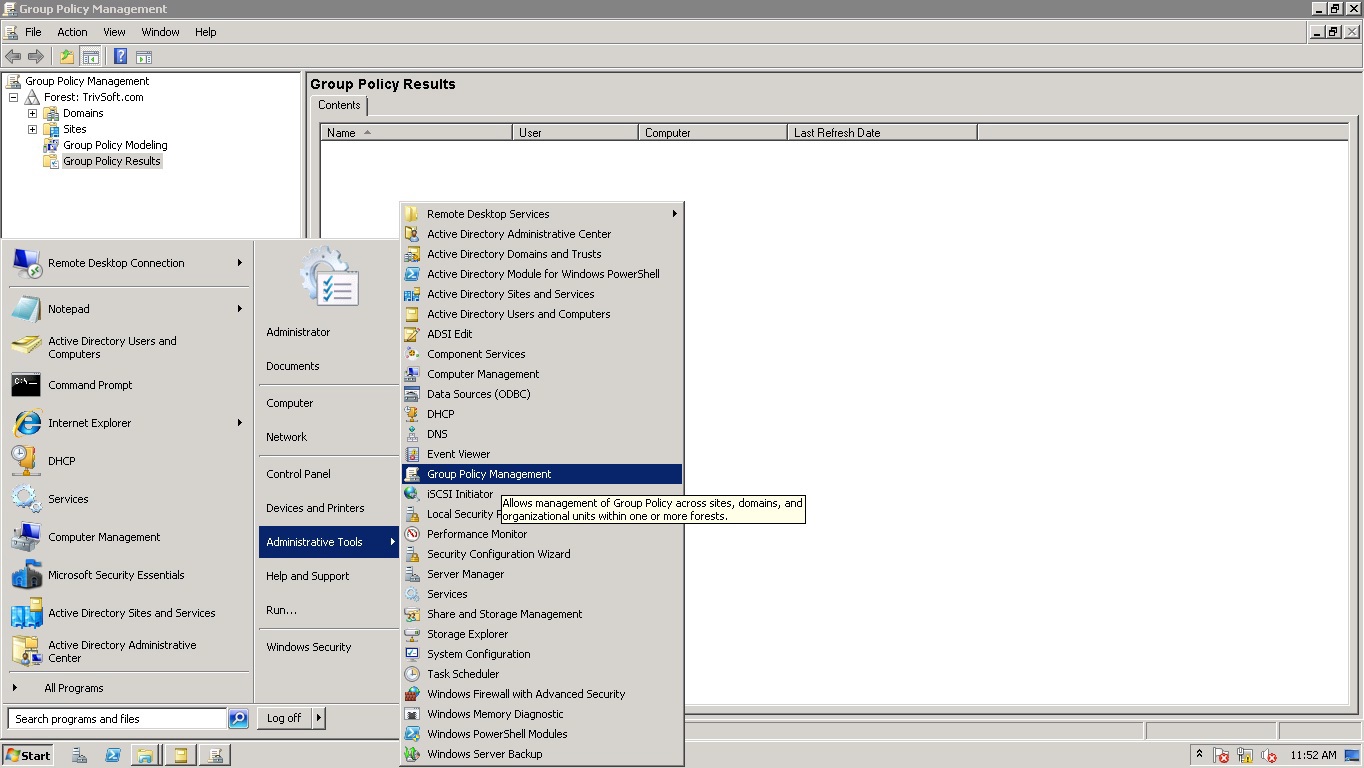
Step 3 – Open Group Policy Management Console
Start -> Administrative Tools -> Group Policy Management
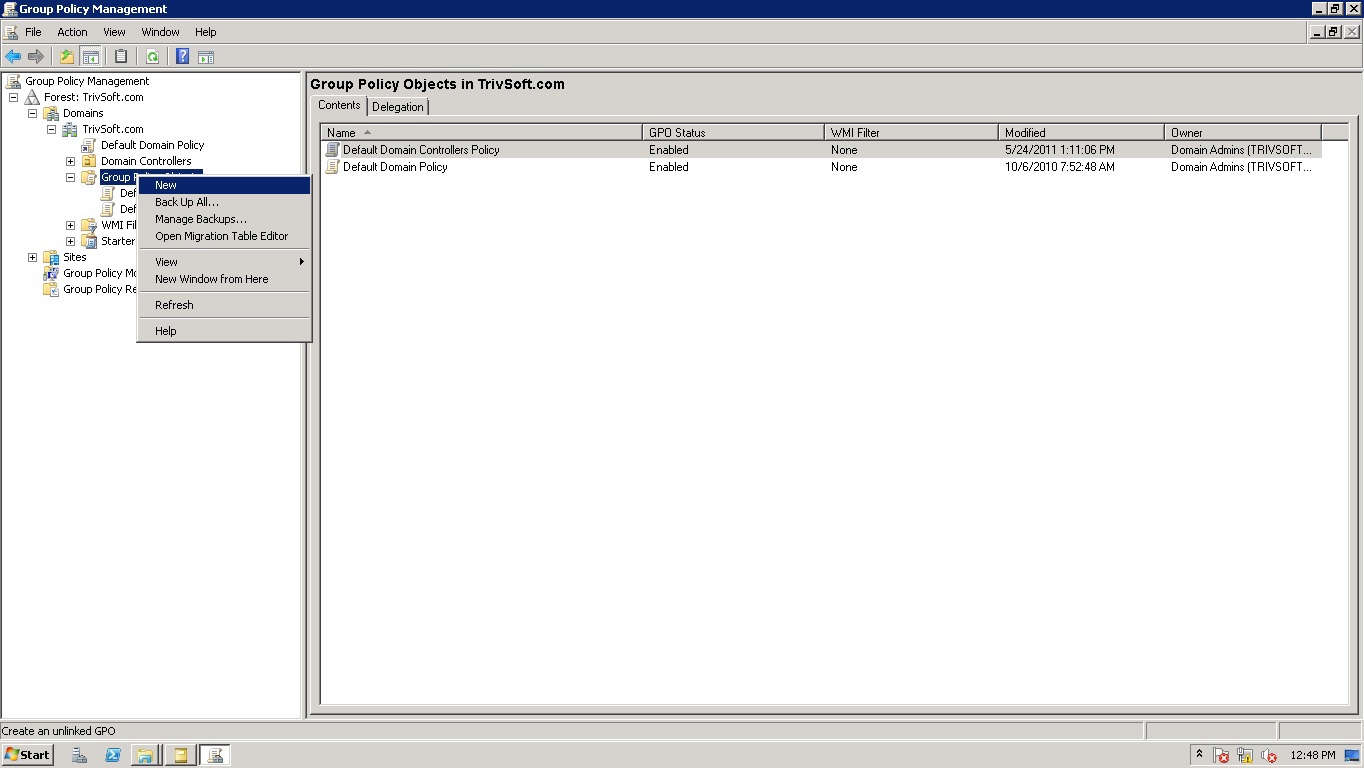
Step 4 – Add New Group Policy
- Select Group Policy Object
- Click Right button on mouse
- Select New from the popup menu
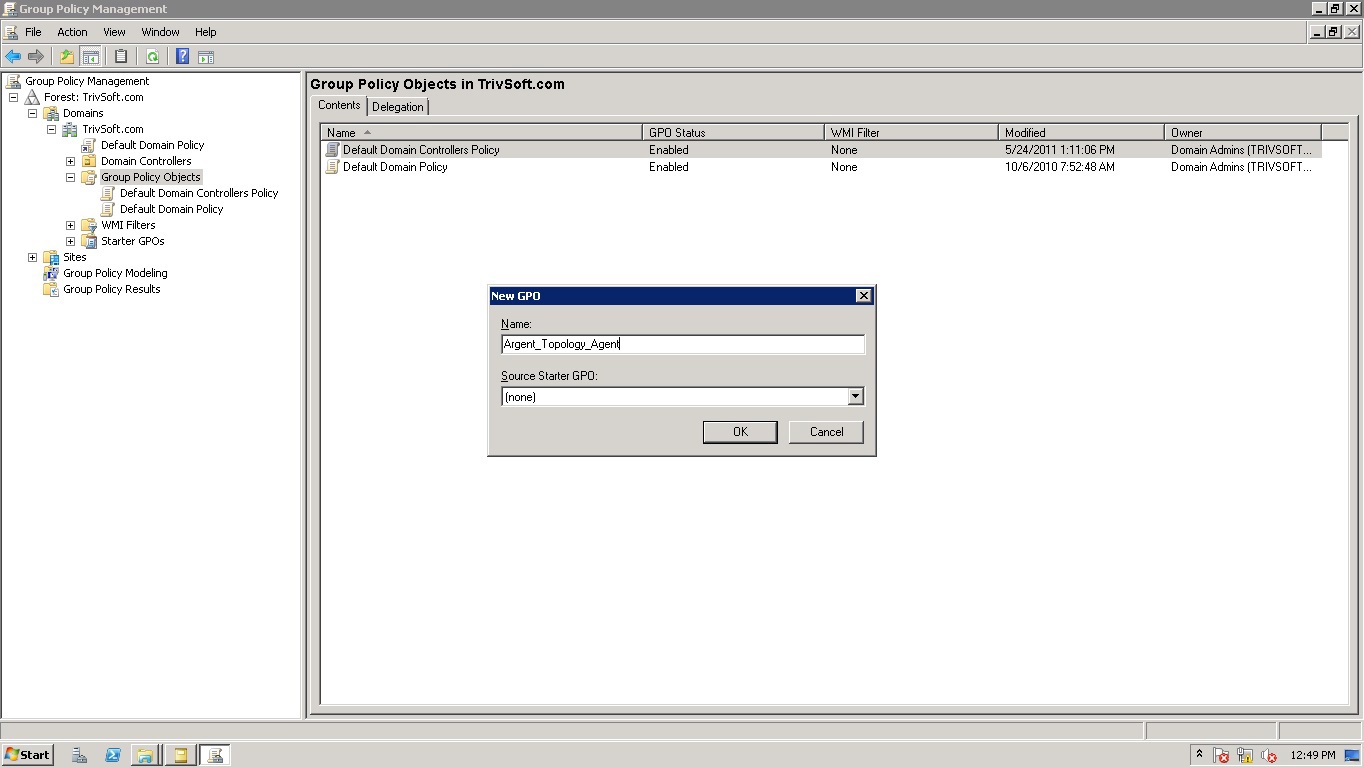
Step 5 – Name the New Group Policy Object
- Name new group policy object as ‘Argent_Topology_Agent‘
- Click ‘OK‘ button
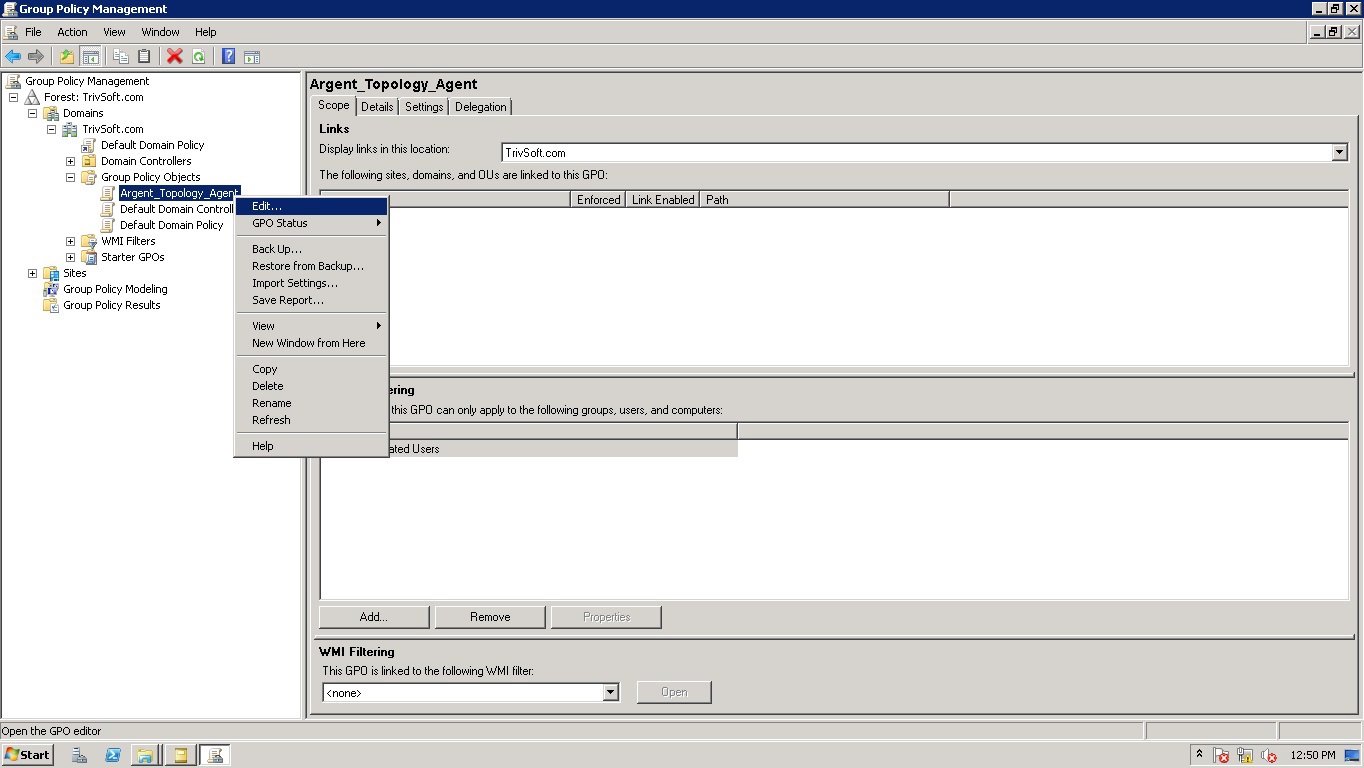
Step 6 – Configure New Group Policy Object
- Select Argent_Topology_Agent under Group Policy Objects
- Click right mouse button
- Select Edit from the popup menu
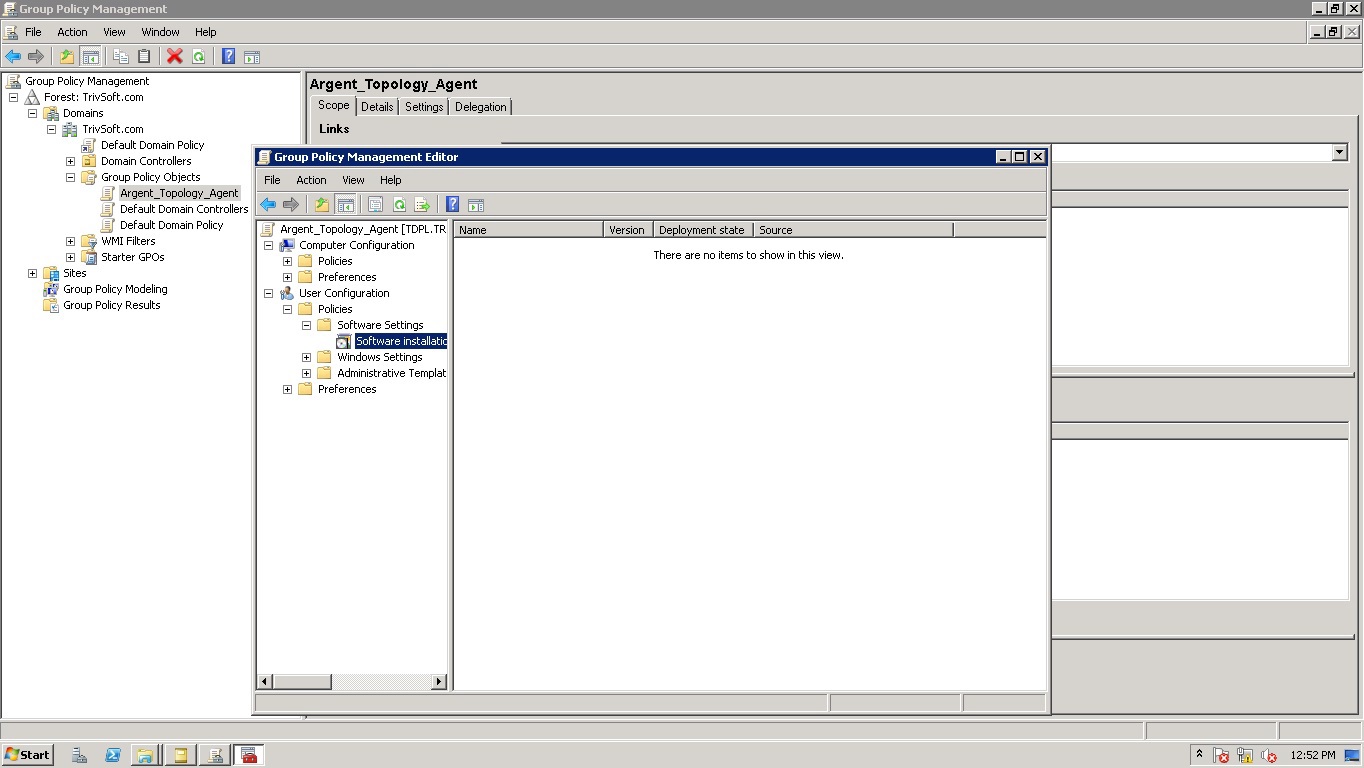
Step 7 – Configure Using Group Policy Management Editor
- Select Software Installation under User Configuration -> Software Settings
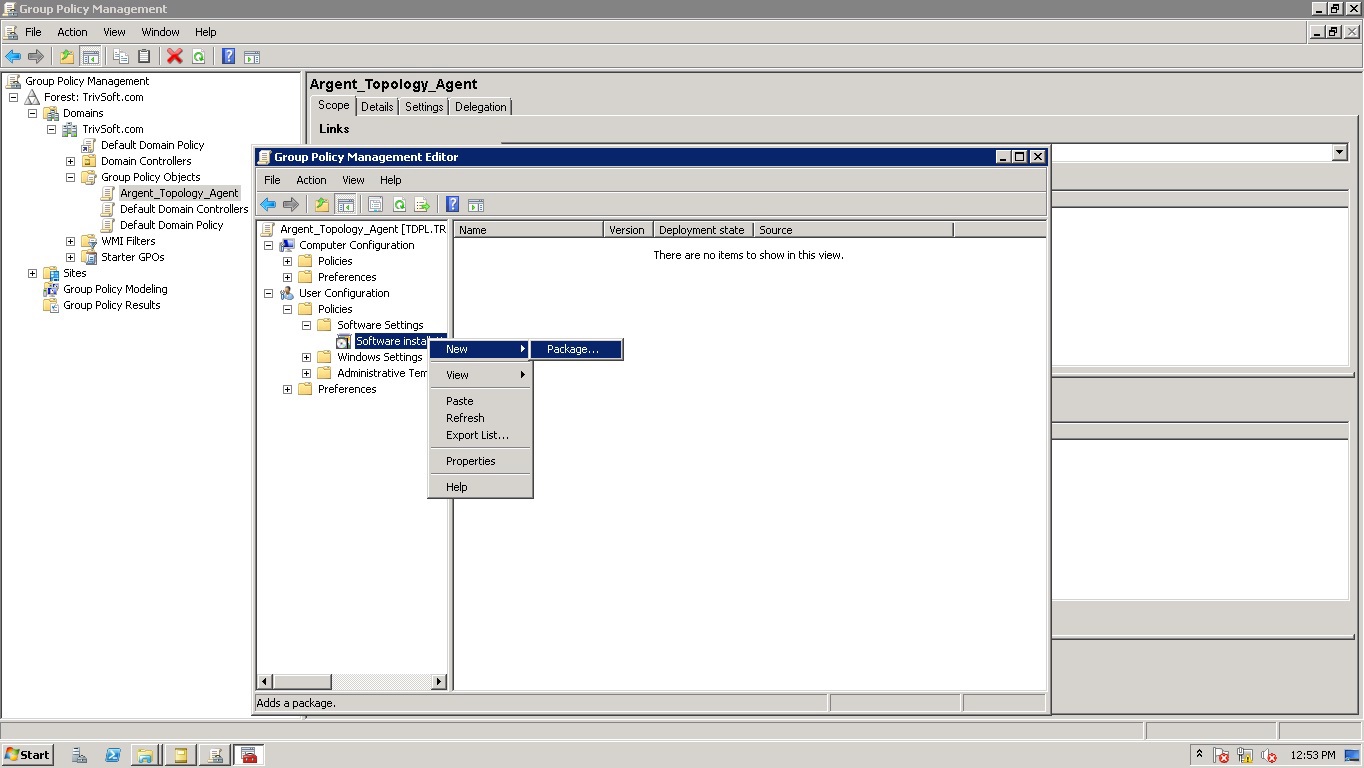
Step 8 – Add Package
- Click right mouse button
- Select ‘New -> Package‘ from popup menu
Step 9 – Set the Path of the Distribution Point
- Please note that you must specify the UNC path of the shared installer package that you want
- For example, \\server\ Argent_Topology_Agent\ ARGENT_FOR_TOPOLOGY_AGENT.MSI
Step 10 – Select Advanced in Deploy Software
Step 11 – Configure Deployment Screen
- Select Assigned in Deployment Type
- Check ‘Uninstall the application when it fails out of the scope management‘
- Check ‘Install the application at logon‘
- Select ‘Maximum‘ in ‘Installation user interface options‘
- Click OK button
Step 12 – Configure Newly Created Group Policy Object
- Activate Group Policy Management console
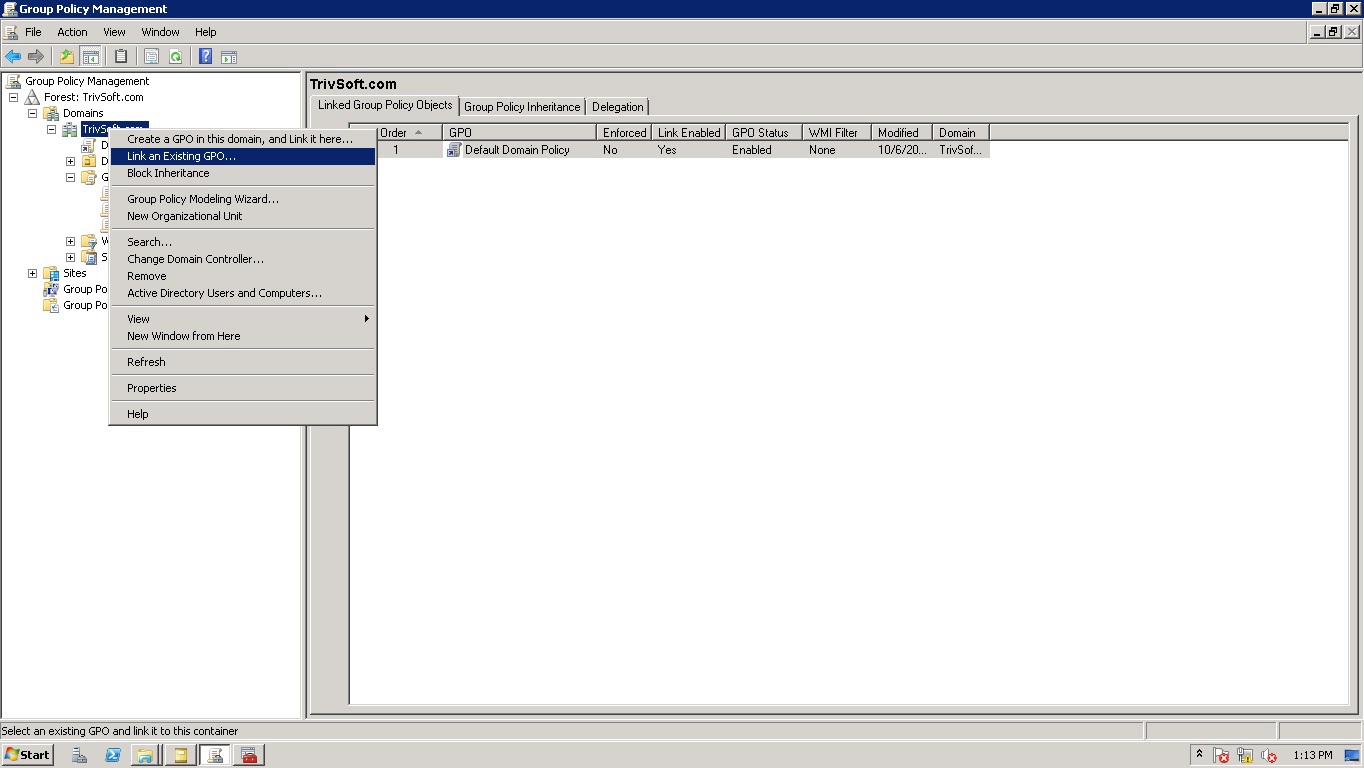
Step 13 – Link Newly Created Group Policy Object
- Select domain under domains
- Click right mouse button
- Select ‘Link on Existing GPO‘
Step 14 – Select GPO
- Select Argent_Topology_Agent
- Click OK button

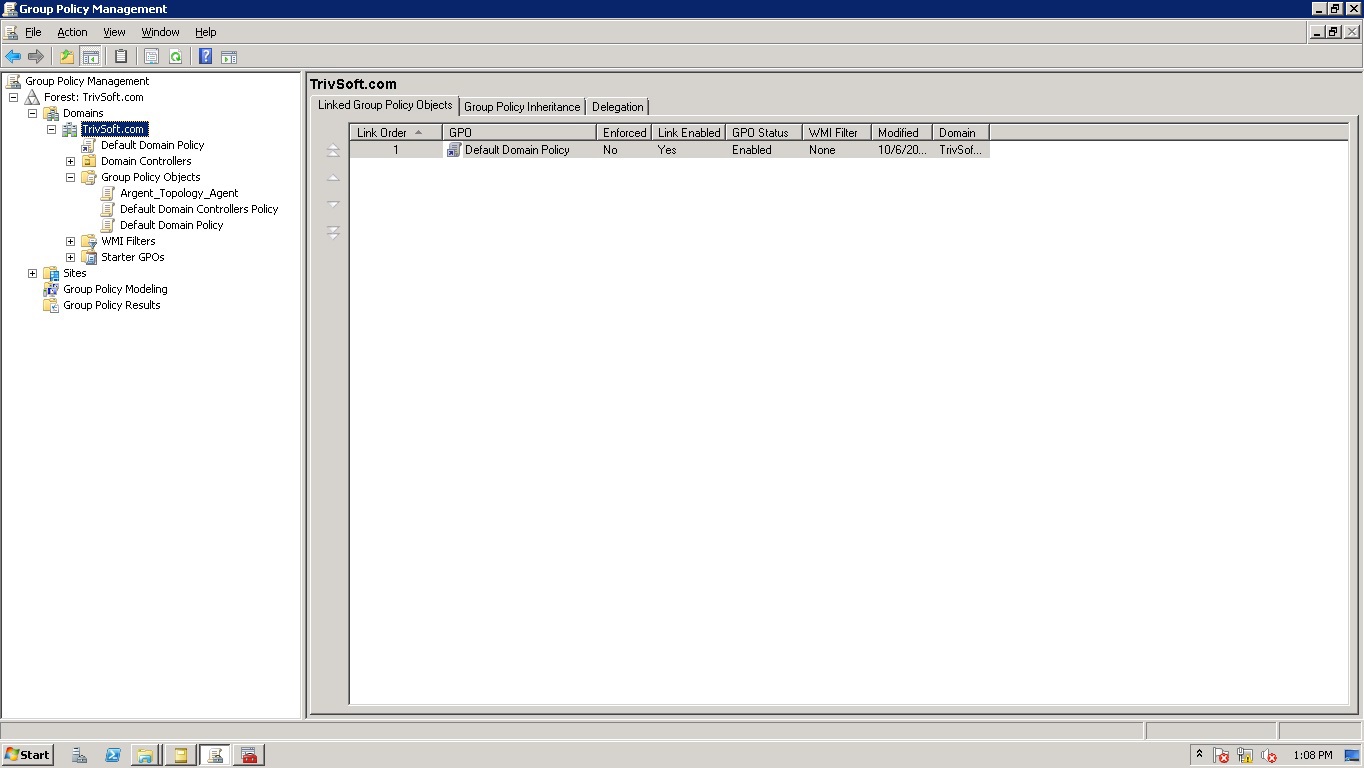
Step 15 – Linked GPO Will be Shown Under the Domain Name
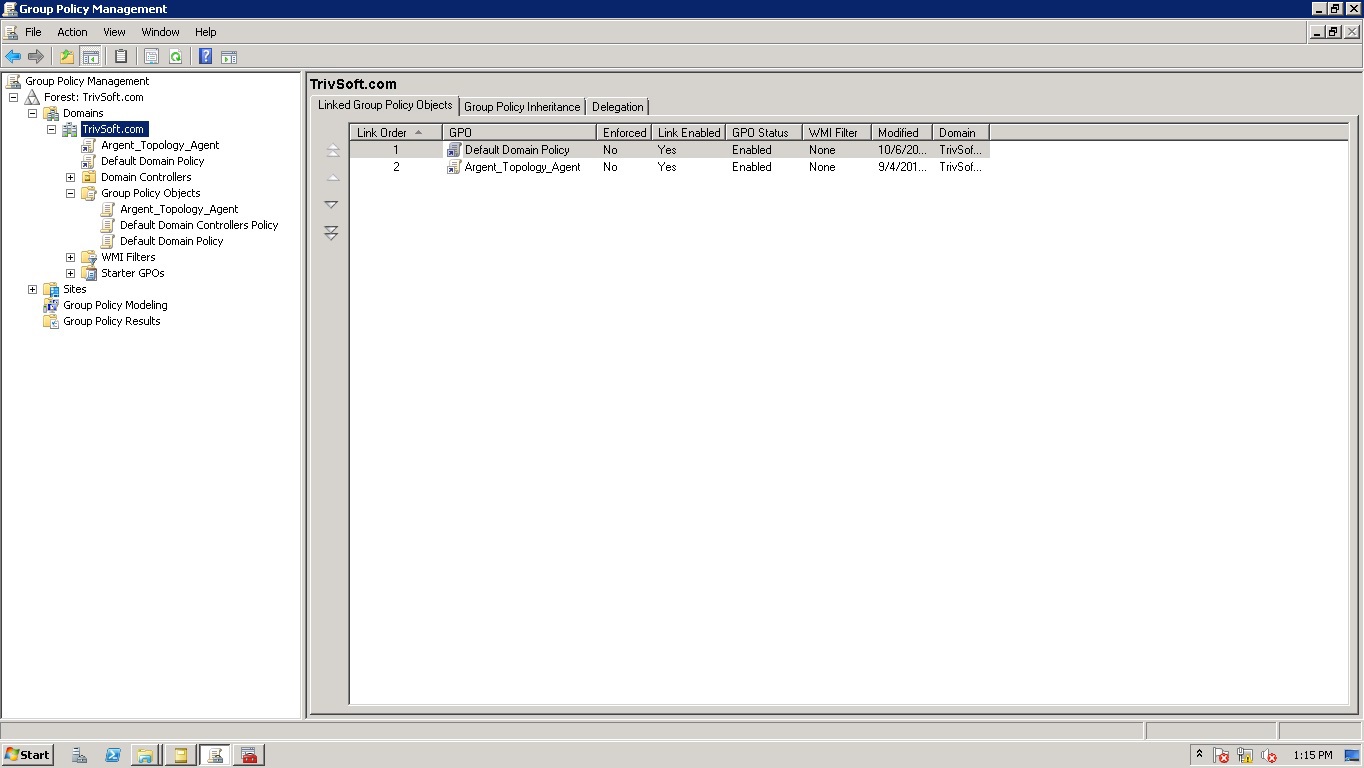
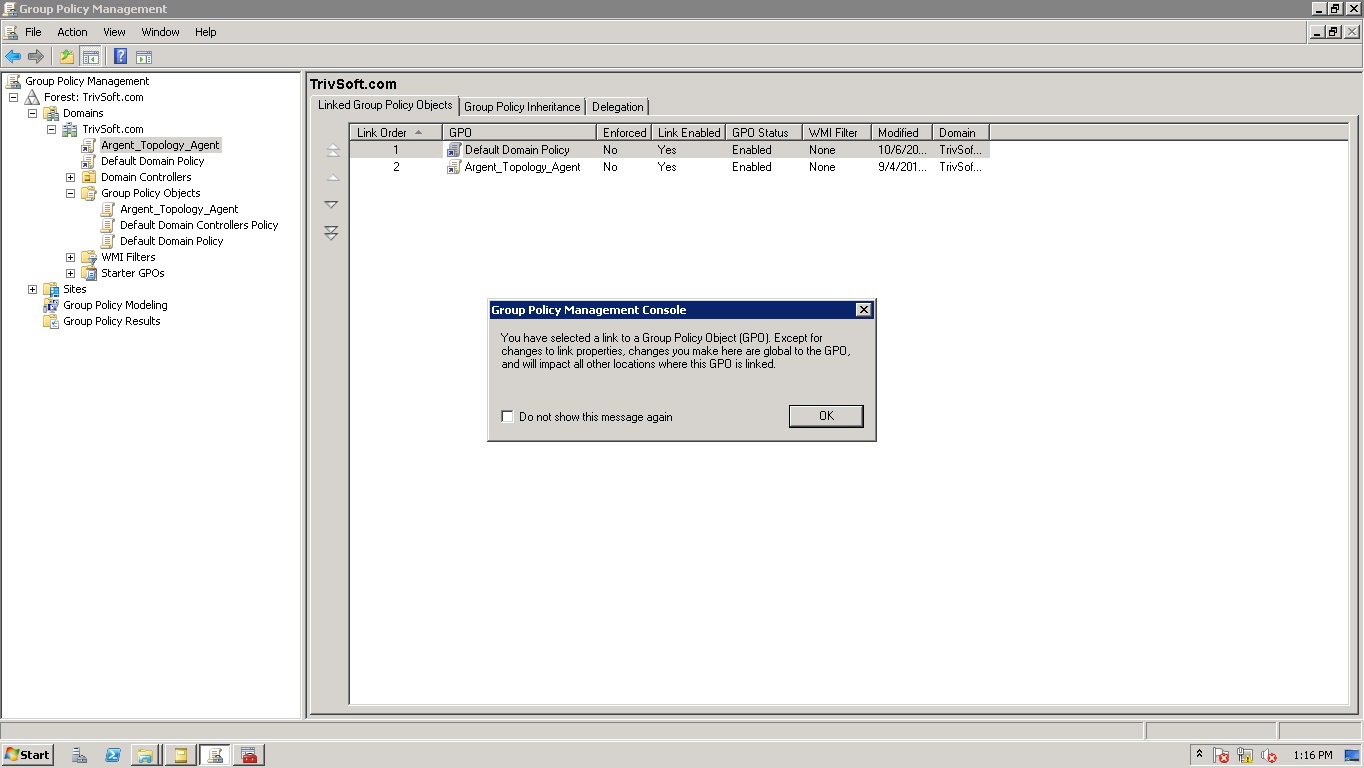
Step 16 – Select Newly Linked GPO Under the Domain Name
- A message box will be displayed
Step 17 – Configure the Scope
- Add the target users

You have successfully created a group policy to install Argent Topology Agent
Agent will get automatically installed on every machine where the users configured in the policy try to log on their machines
Appendix
Redeploy a Package
In some cases, you may want to redeploy a software package (for example, if you upgrade or change the package)
To redeploy a package, follow these steps:
- Start the Active Directory Users and Computers snap-in
To do this, click Start, point to Administrative Tools, and then click Active Directory Users and Computers
- In the console tree, right-click your domain, and then click Properties
- Click the Group Policy tab, click the Group Policy Object that you used to deploy the package, and then click Edit
- Expand the Software Settings container that contains the software installation item that you used to deploy the package
- Click the software installation container that contains the package
- In the right-pane of the Group Policy window, right-click the program, point to All Tasks, and then click Redeploy application
You will receive the following message:
“Redeploying this application will reinstall the application everywhere it is already installed
Do you want to continue?
Remove a Package
To remove a published or assigned package, follow these steps: Click here to show/hide solution:
- Start the Active Directory Users and Computers snap-in
To do this, click Start, point to Administrative Tools, and then click Active Directory Users and Computers
- In the console tree, right-click your domain, and then click Properties
- Click the Group Policy tab, click the Group Policy Object that you used to deploy the package, and then click Edit
- Expand the Software Settings container that contains the software installation item that you used to deploy the package
- Click the software installation container that contains the package
- In the right-pane of the Group Policy window, right-click the program, point to All Tasks, and then click Remove
- Do one of the following:
Click immediately uninstall the software from users and computers, and then click OK
Click Allow users to continue to use the software but prevent new installations, and then click OK
- Close the Group Policy snap-in, click OK, and then close the Active Directory Users and Computers snap-in
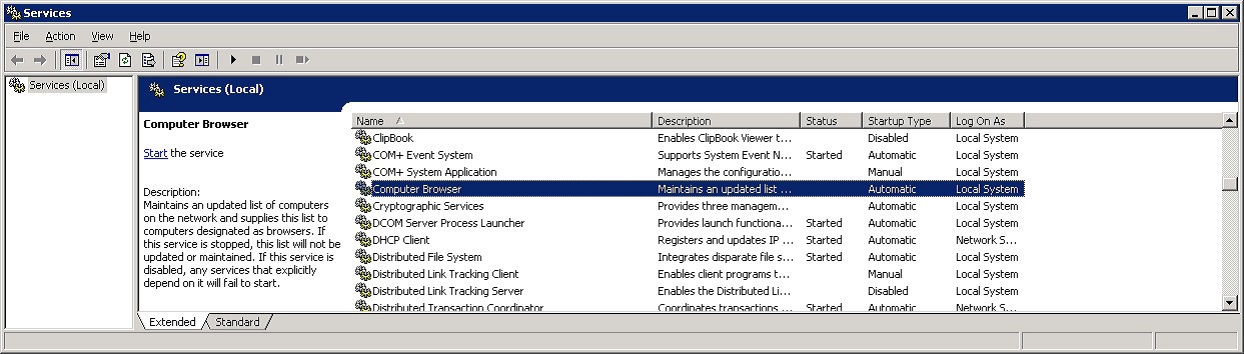
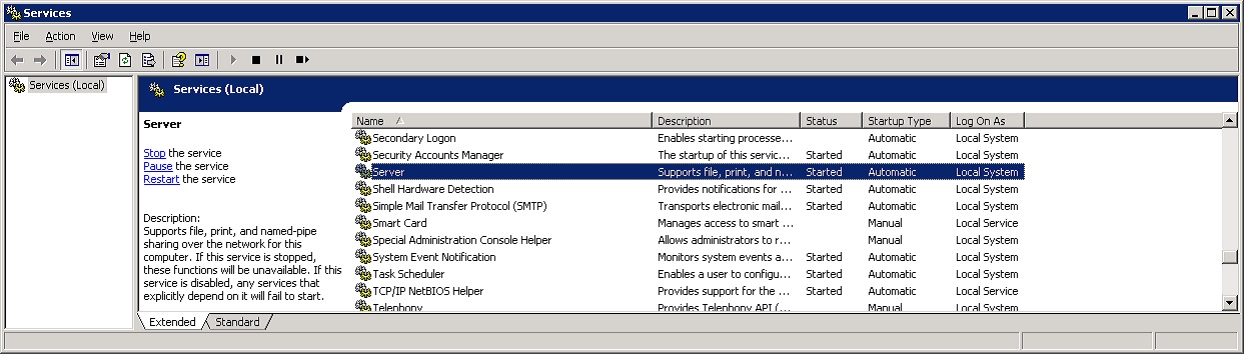
If ‘Sharing and Security‘ menu is missing, please make sure following services are working properly in Service Control Manager:
- Computer Browser
- Server
Resolution
N/A