KBI 311472 AWS Create An AWS Free Tier Account And EC2 Instances
Version
Argent for AWS 5.1A-1610-A and later
Date
Friday, 4 November 2016
Summary
The AWS Free Tier account provides access to a broad range of AWS products for free
However, a credit card is still required – Amazon states that no charges will be made unless the user exceeds the usage limits allowed by the Free Tier account
The usage limits can be found here:
https://aws.amazon.com/free/?pi_faq_2
To create an AWS Free Tier account, customers can take the following steps:
-
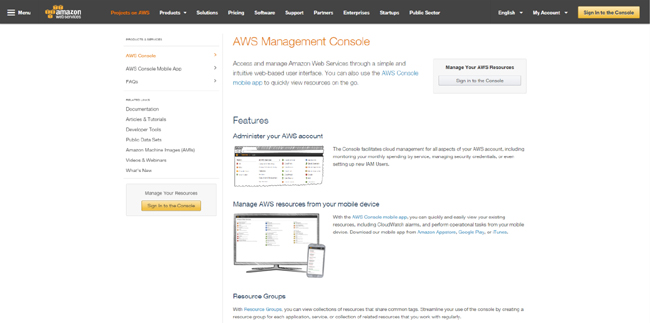
Open this URL: https://aws.amazon.com/console/
- Click on button ‘Sign in to the Console’ at right-top corner
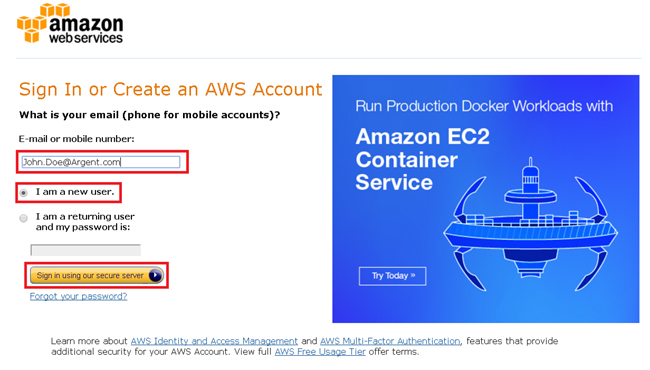
- Select the option ‘I am a new user’, then click on ‘Sign in using our secure server’
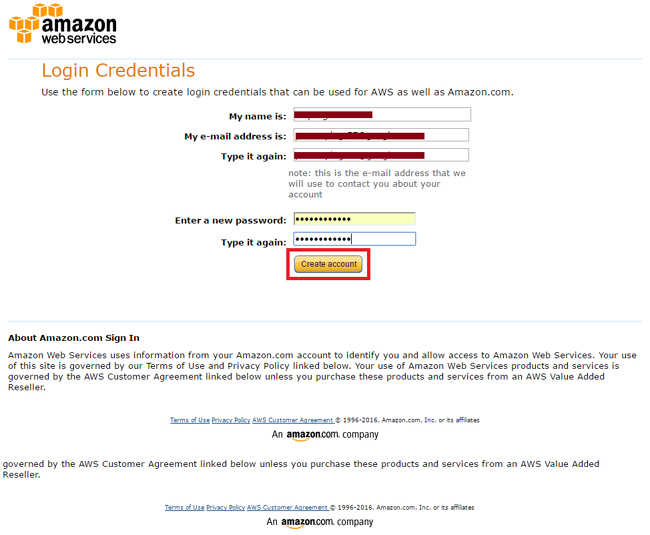
- Specify the logon credentials, and then click on button ‘Create account’
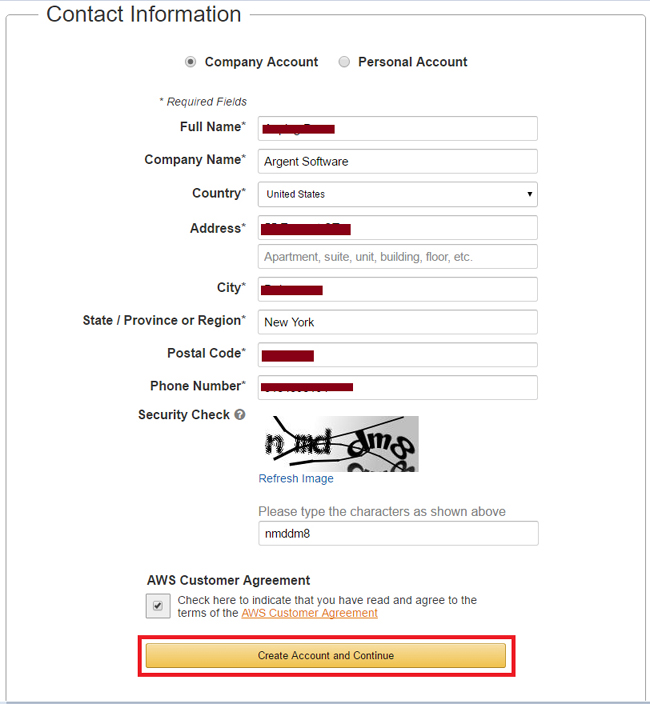
- Specify the Contact Information, and Continue
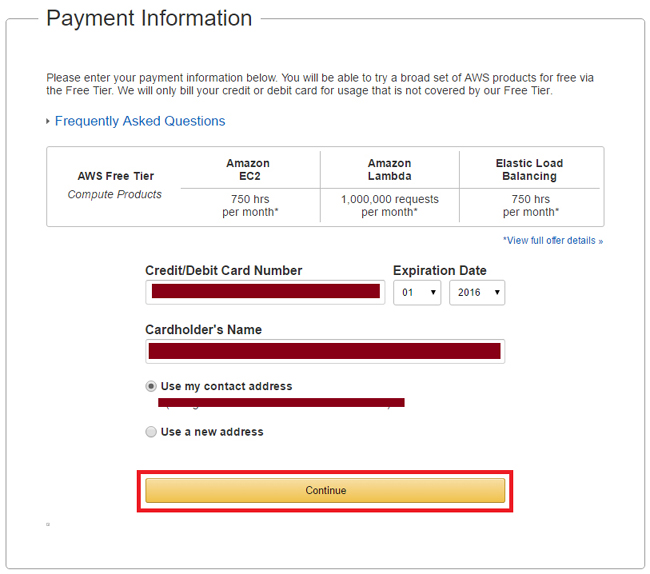
- Enter payment information to create a free tier account
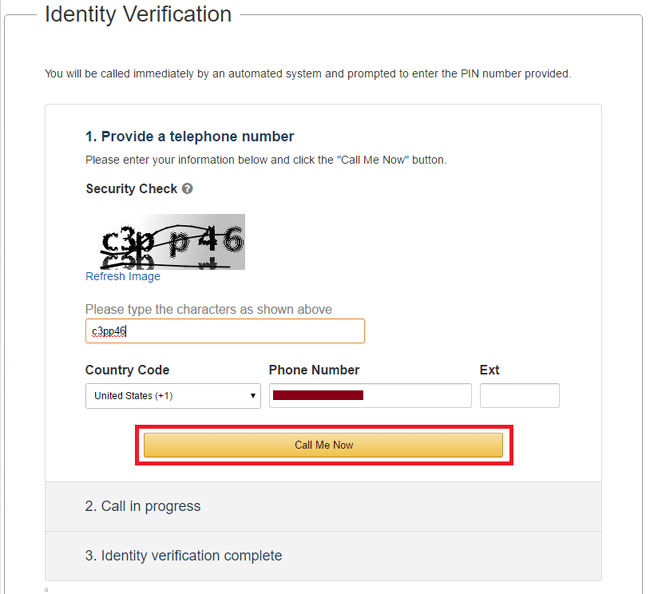
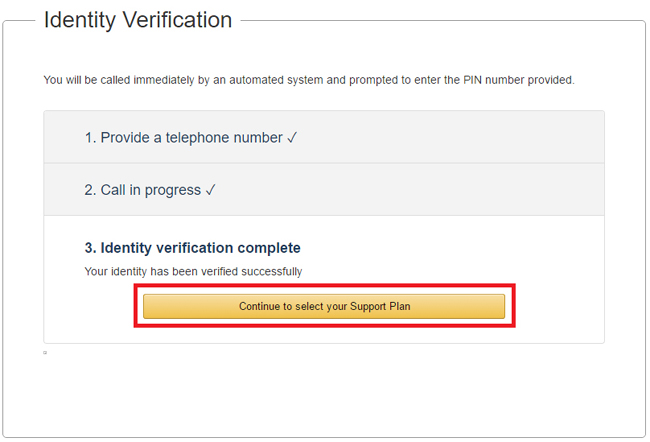
- Complete Identity Verification
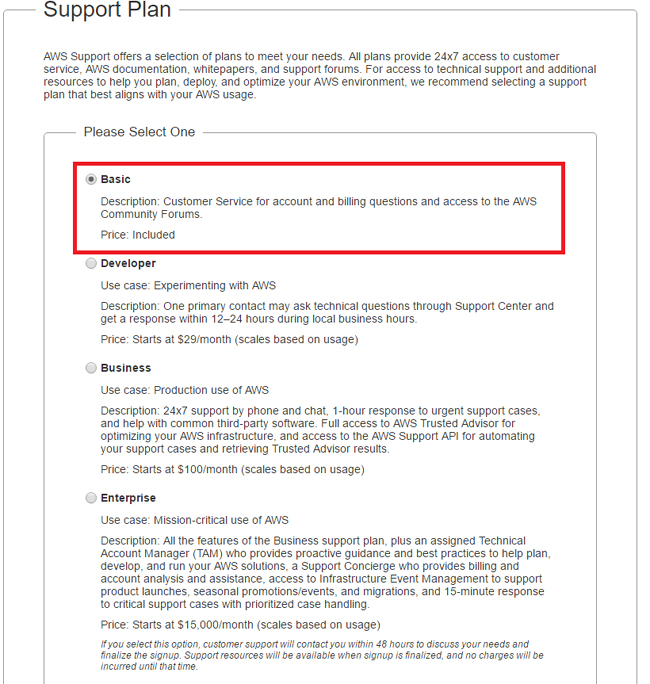
- Select support plan ‘Basic’
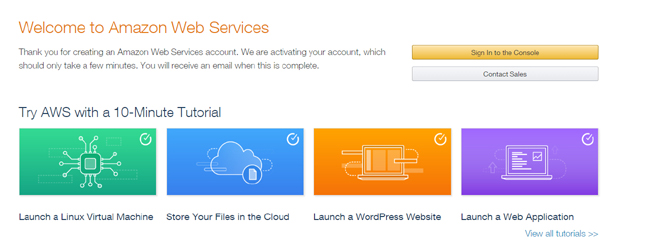
- Now you have successfully created an AWS account
Check your email for a notification when the AWS account is activated
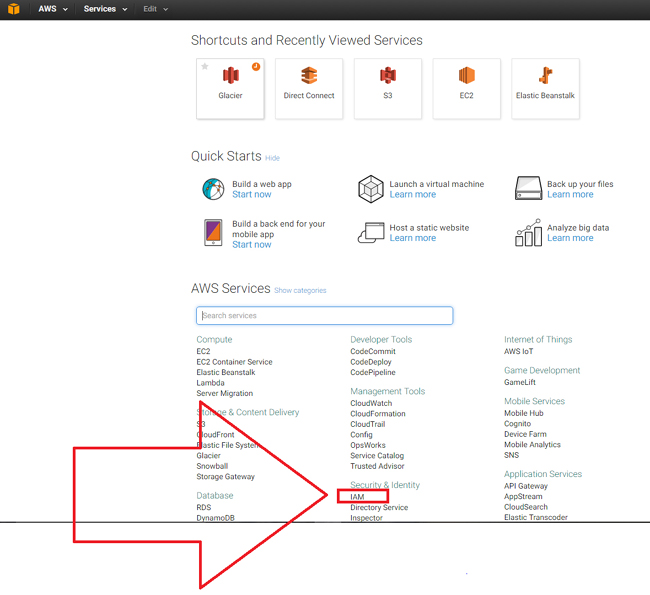
- Sign in to the AWS Console, and click on link IAM under Security & Identity
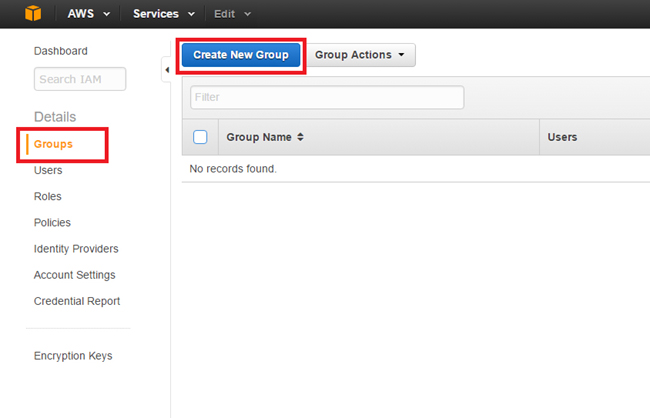
- To create IAM Group with ‘AdministratorAccess’ policy, click on button ‘Create New Group’
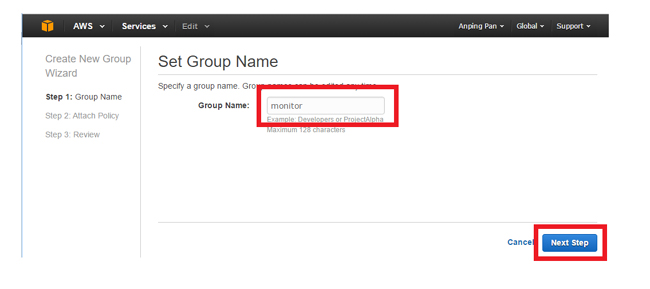
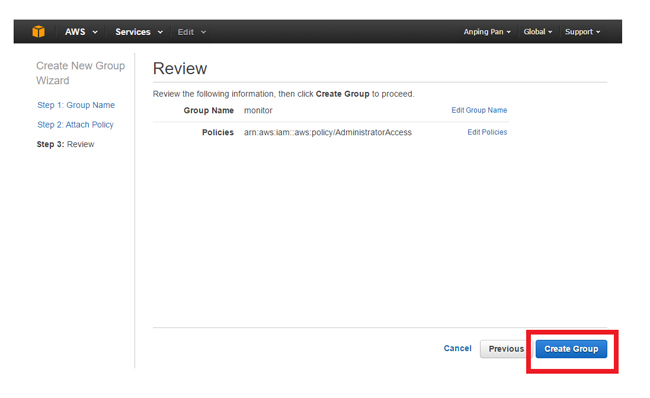
Specify ‘monitor’ as group name and click on button ‘Next Step’
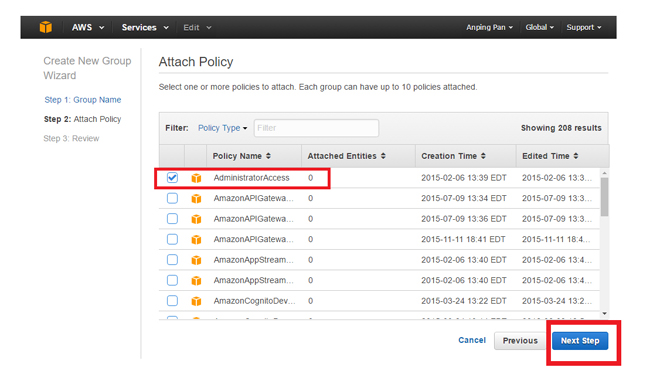
Check ‘AdministratorAccess’ and click on button ‘Next Step’
Click ‘Create Group’:
-
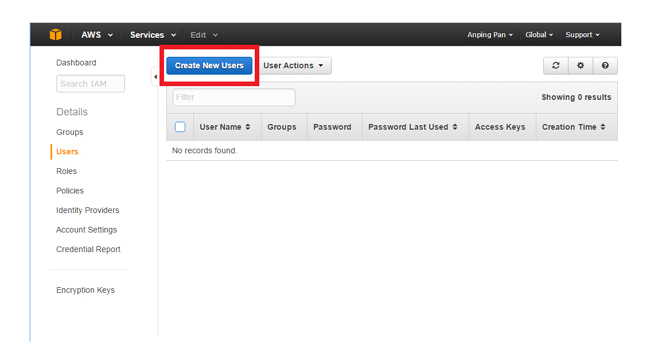
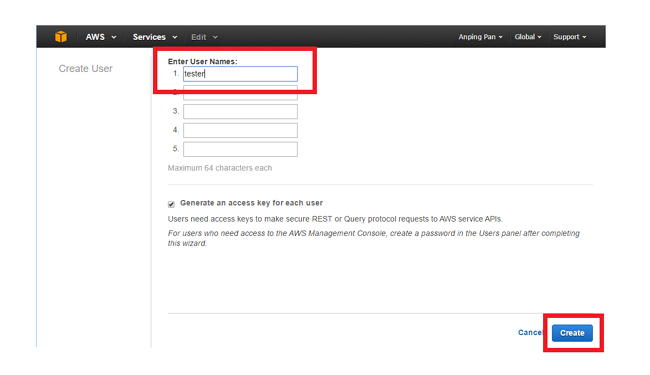
Create new user ‘tester’
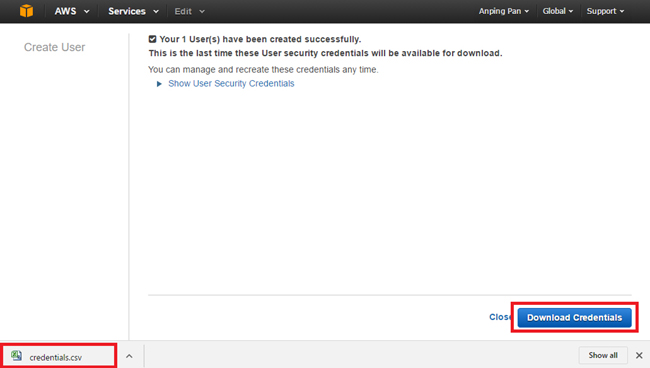
- Download credentials of the newly created user
The user’s ID key and secret are in the downloaded CSV
They are used as logon credentials in Argent for AWS
(Open the downloaded credentials.csv and save the ID key and secret somewhere safe)
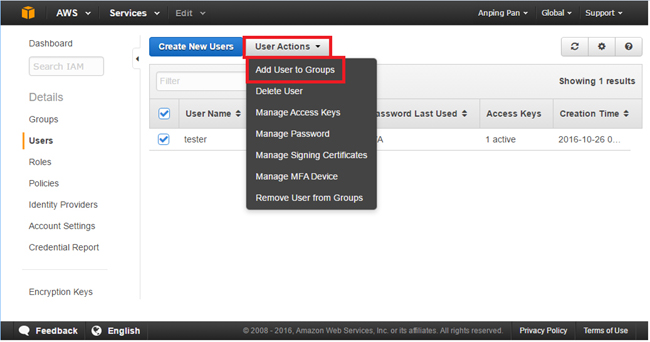
- Add user ‘tester’ to group ‘monitor’
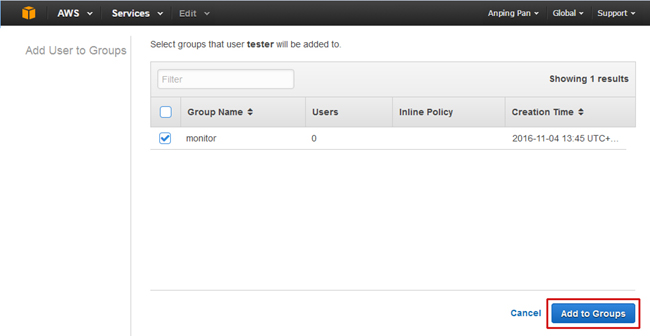
Select the group ‘monitor’ and click on Button ‘Add to Groups’
- Click on link AWS -> Services, then select EC2
Then click on the link ‘Instances’
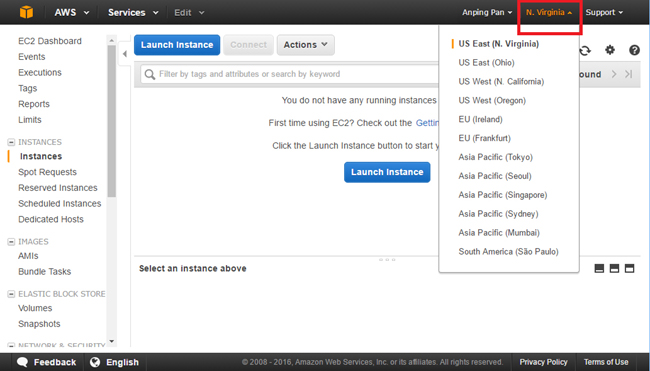
Select the region to create the EC2 instance in the top right
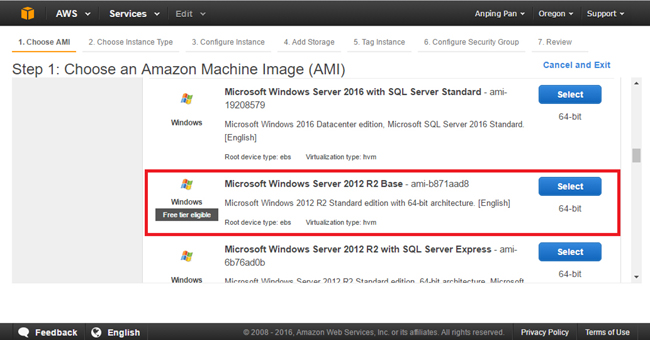
- Create a Windows 2012 R2 EC2 instance
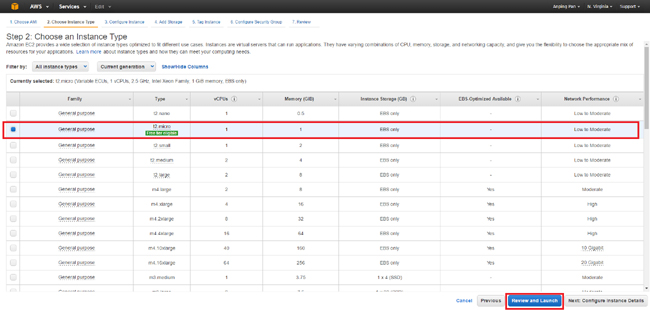
Choose t2.micro as the instance type for ‘Low to Moderate’ usage, and click on the button ‘Review and Launch’
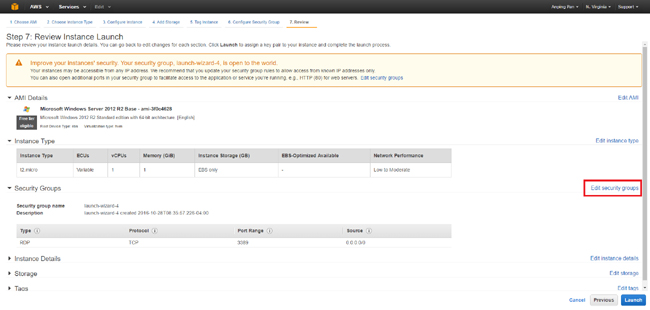
Click on ‘Edit Security Group’
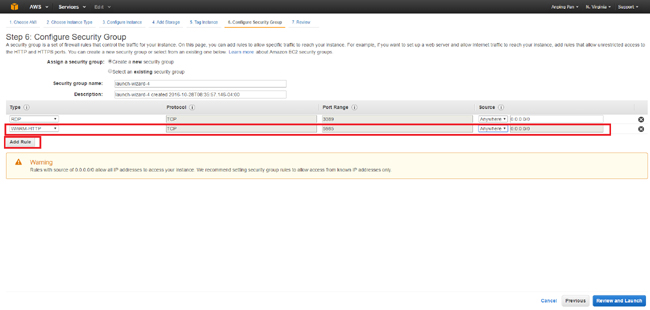
Add the WinRM-HTTP Rule to the security group
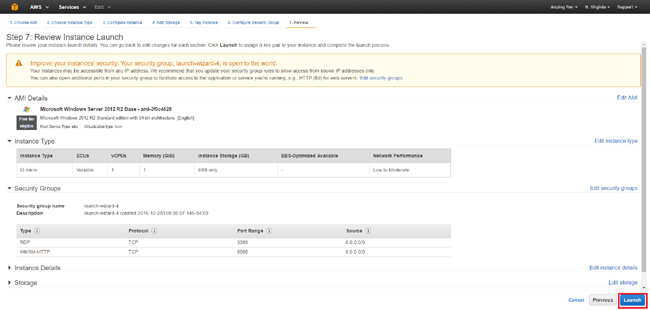
Click on ‘Review and Launch’ to return to the previous screen, and then leave the rest at their default values and click on ‘Launch’
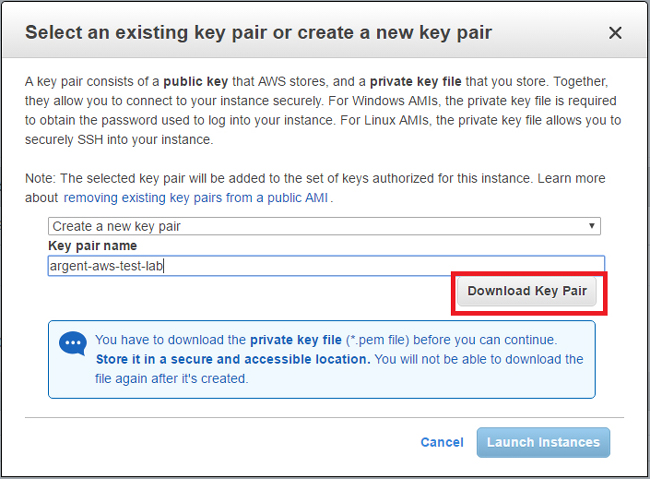
If you have created an EC2 instance before, you should have a key pair already, and if so- reuse it
If you do NOT have an existing key pair, select the option to ‘Create a new key pair’
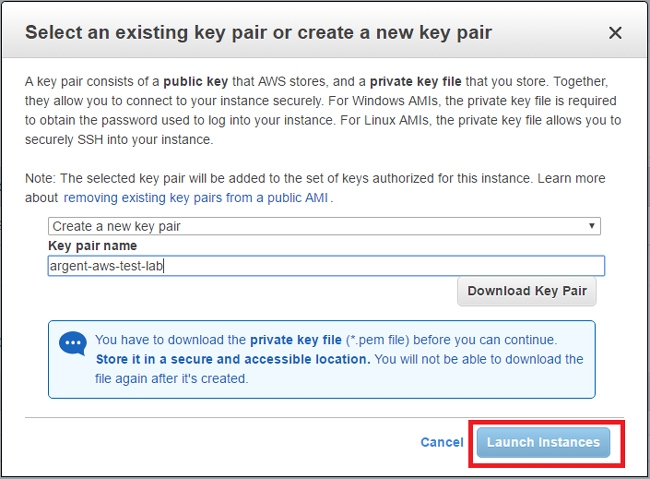
Remember to click ‘Download Key Pair'(and keep the file safe) before launching the new EC2 instance
Click on ‘Launch Instances’ to create the new EC2 instance
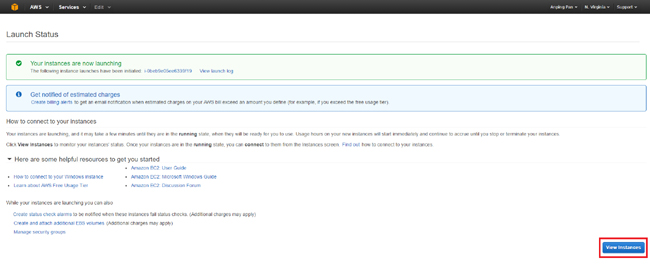
Click on the button ‘View Instances’ to see the newly created EC2 instance
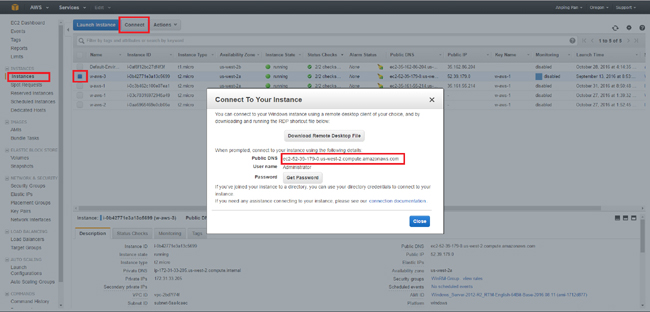
Windows EC2 instances use RDP (Remote Desktop) to gain access remotely
To get the connection information, on the AWS EC2 instance screen, click on ‘Connect’ – a connection popup will appear
The public IP address and user name are shown on the popup
To get the password, click on the button ‘Get Password’
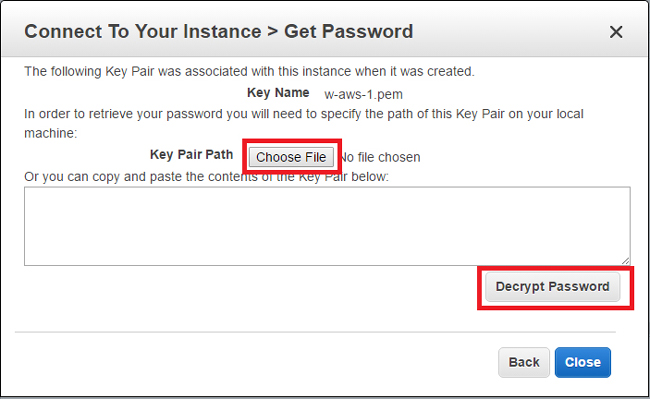
On the ‘Get Password’ popup, load the previously saved key pair file (.pem), and then click on button ‘Decrypt Password’, the password will be shown
Now the customer can use any RDP client to remotely logon to the Windows EC2 instance using the ‘Administrator’ login
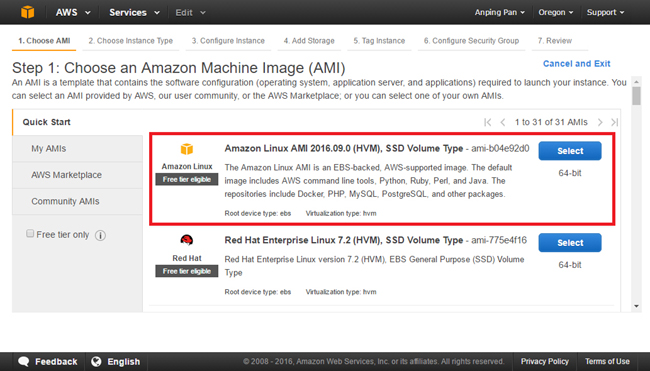
- Create a Linux EC2 instance and follow steps similar to creating a Windows EC2 Instance
Linux EC2 instances use SSH to gain access remotely
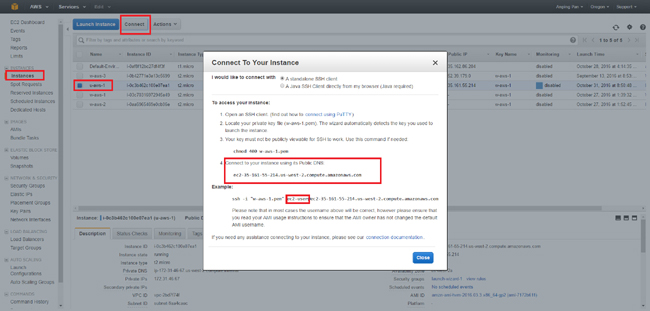
To get the connection information, on the AWS EC2 instance screen, click on ‘Connect’, a connection popup will appear
The public IP address and user name are displayed on the popup
Customers also need the previous saved key pair file (.pem) to SSH into the Linux EC2 instance
To use PuTTY, customers can follow the steps listed in the link ‘connect using PuTTY’
-
If you have logged out of the AWS Console, point the browser to https://aws.amazon.com/console/ to re-open and log back in to the AWS Console
Technical Background
N/A
Resolution
N/A

