KBI 312092 Configure Oracle Instant Client To Monitor Oracle Database Instances Using Argent for Oracle
Version
Argent Advanced Technology All Versions
Date
Tuesday, 26 September 2023
Summary
To support both 32-bit and 64-bit Oracle database server environments, Argent for Oracle requires 32-bit Oracle 12 client libraries and 32-bit Visual C++ Redistributable for Visual Studio 2013 needs to be installed in the Argent Server
There are two ways to install and configure Oracle client libraries in Argent Server
1. Install and configure Oracle 12c 32-Bit Client in Argent Server. Follow the below KBI:
https://help.argent.com/kbi/kbi_311577/
2. Install and configure 32-bit Oracle Instant Client in Argent Server. It is light-weight and less painful to install and configure. The following section describes how to install and configure Oracle Instant Client to connect to a remote Oracle database instance.
Steps To Configure Oracle Instant Client In Argent Server:
Oracle Instant Client is a repackaging of Oracle Database libraries, tools, and header files usable to create and run applications that connect to a remote (or local) Oracle Database.
Instant Client’s advantages are that installation is a quick unzip of a ZIP package.
Instant Client’s footprint is much, much smaller than the full Oracle Client.
Argent uses Oracle 12c C++ Call Interface to monitor Oracle database servers, and these libraries are built using Visual C++ 2013.
So before configuring the Install Client, a 32-bit Visual C++ Redistributable Package for Visual Studio 2013 must be installed on the Argent server to monitor the Oracle instances.
The Visual C++ Redistributable Package for Visual Studio 2013 is downloadable in following Microsoft link:
Do the following steps to configure Oracle Instant Client:
1. Create an installation directory for the Oracle client components. For example: C:\Oracle_Client
2. Download 32-bit Oracle Instant Client version 12.2 from Oracle web site:
Choose Instant Client Package – Basic of version 12.2:

3. Save the file in the installation directory that you created in Step 1.
For example: C:\Oracle_Client\instantclient-basic-nt-12.2.0.1.0.zip
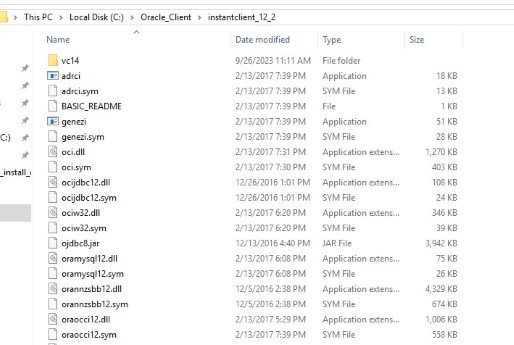
4. Unzip the file. The files are extracted into a subdirectory called instantclient_12_2.
or example: C:\Oracle_Client\instantclient_12_2
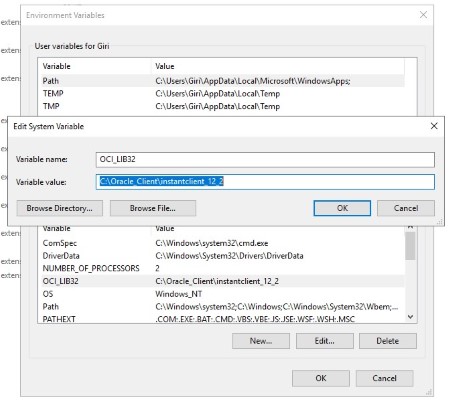
5. Add the full path of the Instant Client to the environment variables OCI_LIB32 and PATH. The following steps set the variables to the path used in this example, C:\Oracle_Client\instantclient_12_2:
a) In Windows Control Panel, choose System, then click Advanced system settings.
b) On the Advanced tab, click Environment Variables.
c) Under System variables, create OCI_LIB32 if it does not already exist. Set the value of OCI_LIB32 to C:\Oracle_Client\instantclient_12_2
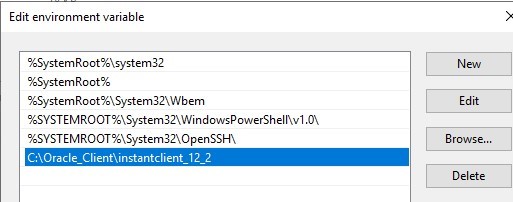
d) Under System variables, edit PATH to include C:\Oracle_Client\instantclient_12_2
6. Add the network configuration file named tnsnames.ora inside TNS folder under C:\Oracle_Client\instantclient_12_2. Create the folder if it is not available:
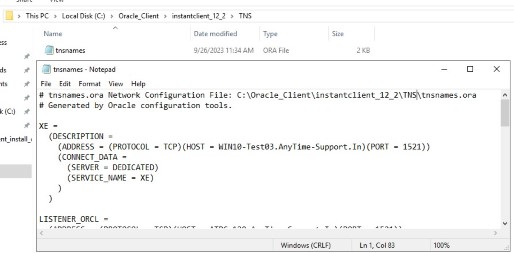
7. Add TNS_ADMIN environment variable that tells the client where to look for tnsnames.ora file. In our example, it will point to the folder C:\Oracle_Client\instantclient_12_2\TNS:

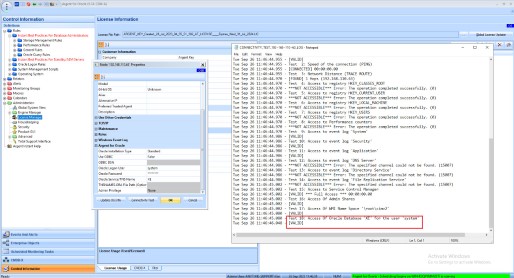
8. Check Oracle database instance connectivity in Argent for Oracle.Open Argent for Oracle GUI and configure the Oracle database instance in CMDB-X. Ensure that the corresponding entry for the specified Oracle instance is in the tnsnames.ora file.
Note:
Please restart Argent for Oracle Scheduling service named Argent for Oracle – Scheduling Engine to reflect the new Environment Variable changes.
Resolution
N/A